Last Updated on January 8, 2025 by Homegrown Florida
This post may contain affiliate links. Read full disclosure here.
I want to chat about the three biggest mistakes I made when I first started gardening that really set me back for years. These were simple issues, but they were detrimental to my garden’s success. I’m sharing them with you because I wish I had someone to tell me how to avoid these gardening mistakes earlier! If you can get a handle on these three things, you’ll be on your way to a much more productive and enjoyable gardening experience.
Mistake #1: Not Understanding When to Plant
The first major gardening mistakes I made was not understanding when to plant my crops. Timing is everything in gardening, and for a long time, I just couldn’t figure it out. I’d plant things at the wrong times of the year, and they’d either die or not produce well.
For northern gardeners, timing often revolves around frost dates. You plant based on the last frost date in spring or the first frost date in fall, and many seed packets will give you instructions like “start indoors 3 weeks before your last frost.” It’s a pretty straightforward process.
But here in Florida (and in other hot climates), we don’t rely on frost dates because we hardly get any frosts. Last winter, for example, I didn’t have a single frost! Instead, we have to time our planting based on seasonal heat patterns — specifically, when the extreme heat of summer starts to ease up or when it’s mild enough to start seedlings without them baking in the sun.
How I Plan My Planting Times

If you’re in Florida or the southern U.S., timing your planting involves paying attention to your local weather patterns. For example, here in Central Florida, I start planting my cool-weather crops like broccoli, cabbage, and lettuce in the fall when the extreme heat is gone, but it’s still warm enough for plants to thrive.
- Cold Weather Crops: Plants like broccoli, carrots, onions, and lettuce love cooler temps. Aim to get these in the ground between October and February when nighttime temps range from 40°F to 65°F.
- Warm Weather Crops: Think tomatoes, cucumbers, peppers, and squash. These guys love it warm but not scorching. I start seeds indoors in January and plant them out around March when the temps are in the 70s and 80s or in August and transplant in September for a fall crop.
- Hot Weather Crops: Crops like sweet potatoes, okra, and cowpeas thrive in the hottest part of the year. They can handle our intense summer heat, so I plant them between May and September.
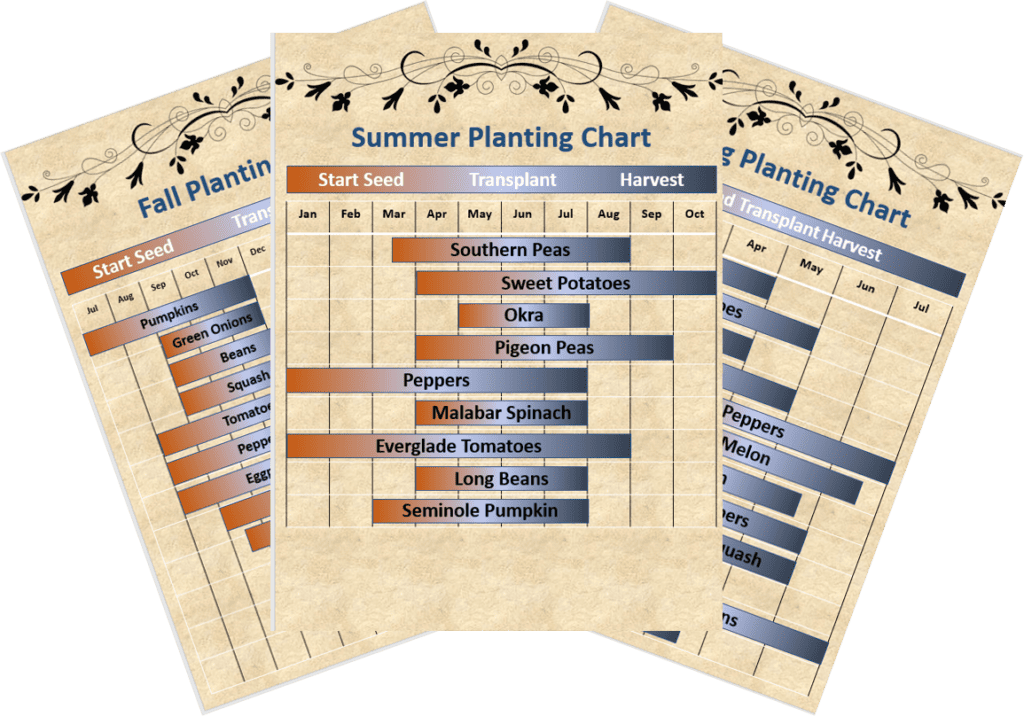
For my Florida friends, I’ve created a planting guide which helps pinpoint when to plant based on your area. This will give you a great head start!
Mistake #2: Poor Soil Choices

The second major mistake I made was with soil. In the beginning, I had the misconception that soil was just dirt, a simple medium for plants to grow in. So, like many beginners, I went out and bought the cheapest soil I could find and thought I was good to go.
Here’s the reality: soil is so much more than just dirt. It’s a living ecosystem filled with nutrients, organic matter, microbes, and the right balance of air and water retention. When you skimp on quality soil, your plants suffer.
How to Choose the Right Garden Soil
There are two main types of soil you’ll need depending on how you’re growing:
- Potting Mix: For containers, you’ll want a light, fluffy potting mix. This helps retain moisture while also providing good drainage.
- Garden Mix: If you’re growing in raised beds or in-ground, go for a garden mix that’s rich in organic matter but has enough bulk to provide structure.
My favorite soil to use is Pro-Mix (which is great for container gardening). Pro-Mix is affordable and available at Walmart. It is one of the fluffiest, nutrient-rich soils you’ll find.
For those of you who are more DIY-inclined, you can also make your own soil mix! Here’s a simple recipe:

- 3 part peat moss (for moisture retention)
- 1 part compost (for nutrients)
- 1 part perlite or vermiculite (for drainage)
If you’re growing in a raised bed, start by filling the bottom with organic debris like branches, grass clippings, or leaves. Then, layer on top with a mix of compost and soil. This method not only fills your bed cheaply but also adds nutrients as the organic material breaks down underneath.
Mistake #3: Improper Watering Techniques

Finally, let’s talk about watering. Watering was something I seriously struggled with. In my early gardening days, I would either water too much or too little, and both gardening mistakes can be equally devastating for your plants.
Underwatering
Underwatering is fairly easy to spot. Plants will look droopy, dry, and lifeless. When I first started, I watered infrequently, assuming a quick top spray was enough. But top watering only wets the surface, leaving the roots dry.
Overwatering
As I became more cautious about underwatering, I swung to the other extreme: overwatering. Overwatered plants tend to have yellowing leaves, mushy stems, and their roots can rot. This happens because the soil becomes waterlogged, preventing oxygen from reaching the plant’s roots.
The Fix: Deep Watering and a Moisture Meter
The solution to both over and underwatering is deep watering. This means watering enough that the water reaches the deeper roots of your plants. Shallow watering only wets the top layer of soil, which dries out quickly. With deep watering, you water less frequently but with a larger volume.
I highly recommend investing in a moisture meter. It’s a simple tool you stick into the soil to check if your plants need water. It takes the guesswork out of watering and helps prevent over or underwatering.
You can also try bottom watering for potted plants. Simply fill the saucer beneath the pot with water and let the soil absorb it from below. This method ensures the roots get water without leaving the surface too wet, which can lead to fungal issues like damping off.
Bonus Tip: Automate Your Watering

Once you get serious about gardening, consider automating your watering system. A simple timer attached to a hose and connected to either a soaker hose or drip irrigation system can save you a lot of time and effort. It also ensures your garden stays hydrated even when you’re away or too busy.
I hope sharing these three struggles helps you avoid the same gardening mistakes I made early on in my gardening journey. Whether it’s getting your timing right, investing in good soil, or learning the best way to water, these adjustments will set you up for a successful and productive garden. Happy gardening, friends!


