Last Updated on October 30, 2025 by Homegrown Florida
Growing Peanuts might be the most delightfully strange crop you can grow. They’re not tree nuts at all. They’re legumes, right alongside beans and peas. They flower above ground, then send little “pegs” down into the soil where the peanuts actually form. The first time you see it, it feels like garden magic. I’ve been growing them a few years now, and they’ve become one of my favorite summer crops because of how simple they are once you understand their rhythm.
Table of Contents
This post may contain affiliate links. Read full disclosure here.
When to Plant in Florida
Peanuts are warm-season crops that need a long growing window. In Florida, you can plant anytime between March and June, with six months being ideal for full-sized peanuts. I planted mine in May this year, and they’ve been growing for about five months. Starting too late tends to produce smaller pods, which I learned firsthand last year. Giving them the full season really pays off.
Planting: Shells or No Shells?
When it comes to planting, I’ve experimented both ways with growing peanuts still in their shells and with the seeds removed. For me, planting in the shell led to much better germination. The shells seem to offer protection and hold just the right amount of moisture. If you only have seed peanuts without shells, it helps to soak them overnight before planting to soften the outer coating and improve sprouting.
I planted about an inch deep this year. Some of my Tennessee Valencia peanuts came from The Urban Harvest, and those arrived without shells, which gave me not-so-great germination. But when I saved my own peanuts from the previous year, dried them, and replanted them in their shells, the difference was obvious, almost all sprouted. So if you have the choice, go with in-shell. If not, give them a good soak before planting.
Soil and Care
Peanuts love full sun and heat, so choose a bed that gets sun all day long. My peanut bed has zero shade, and they thrive there even through Florida’s peak summer. These plants don’t need fertilizer because, as members of the legume family, they naturally fix nitrogen in the soil.
If your bed has never grown beans, peas, or peanuts before, it’s worth adding a legume inoculant when you plant. That introduces a beneficial bacteria that helps convert nitrogen into a usable form for the plants. Without it, growing peanuts can appear yellow and weak at first, even if you fertilize. Once the right bacteria colonize the roots, they’ll perk up and stay green for the rest of the season.
Aside from that, growing peanuts are almost maintenance-free. I never sprayed for pests or added extra fertilizer. Mine have been chewed on by insects, soaked in rain, and baked by the sun, and they still produced. If you want a summer crop that doesn’t require pampering, peanuts are a winner.
Growing Peanuts

This is the part that surprises everyone. Peanuts don’t grow on the plant like beans or peas. They actually form underground. After flowering, the spent flower forms a little spike called a peg that bends down and burrows into the soil. At the end of that peg is where each peanut develops.
If the peg can’t reach the soil, for instance, along the edge of a raised bed, you’ll see small pods trying to form above ground. They usually stay small, so it helps to keep the plant canopy over soil where those pegs can reach down. Once the plants are established, you’ll notice dozens of little pegs digging into the ground. That’s when the magic is happening beneath the surface.
Harvest Time
You’ll know peanuts are getting close when the plants start looking tired. The leaves fade from green to yellow, and the tops look worn out. That’s exactly what you want to see because it means the pods underground are mature. Some gardeners wait until the plants completely die back, similar to potatoes, but once they start drying and looking rough, they’re ready to pull.
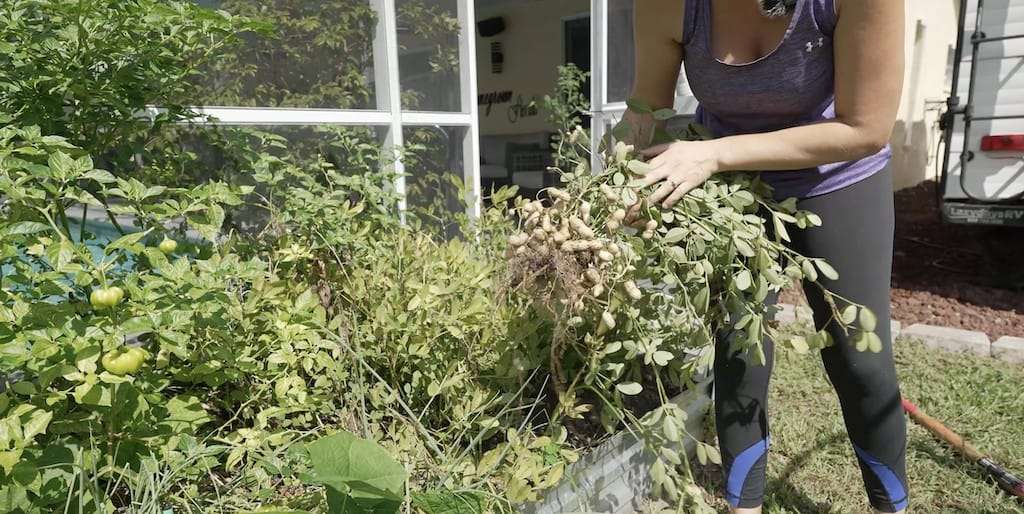
To harvest, I use a pitchfork or garden fork to gently loosen the soil from the side before lifting. Pulling by hand can leave a lot of peanuts underground, so digging helps keep them attached. I noticed that plants with a little more space between them had larger yields, and those in the sunniest part of the bed performed best. You’ll also discover a few open shells where squirrels helped themselves since they love peanuts as much as we do.
Drying and Curing
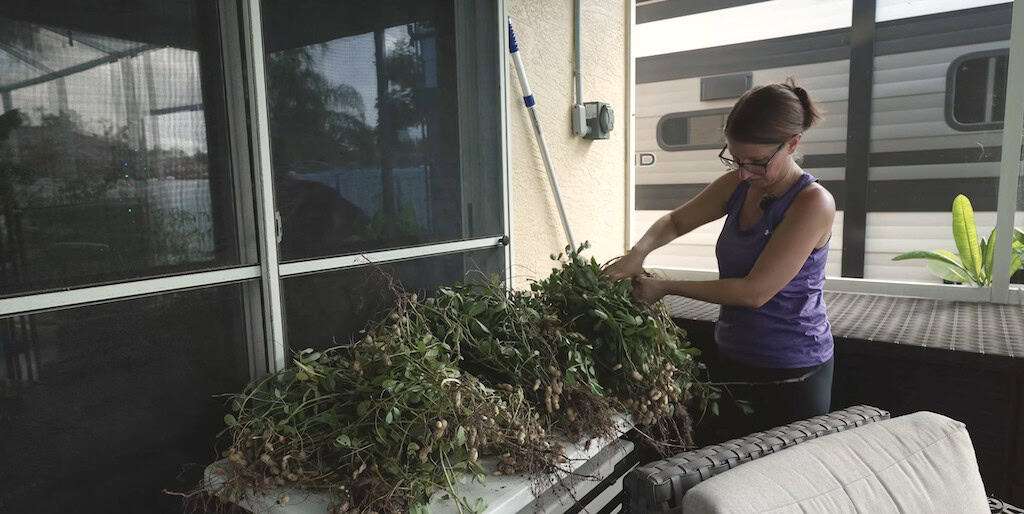
Fresh-dug peanuts are soft and damp, and they need time to cure before storage or roasting. The easiest method is to leave the peanuts attached to the plant for the first stage of drying. Shake off excess soil and spread the plants in a single layer with plenty of airflow, ideally somewhere shaded and dry. I leave them like this for a week or two until the pods lose that moist, green feel.
Any loose peanuts that broke off can be placed in mesh or organza bags to dry separately. I hang mine on the pool cage where they get airflow but no rain. After the initial dry period, the pods can be removed from the plants and laid out on a table or mesh rack to finish drying completely. Leaving them on the plant at first helps prevent mold and gives a cleaner cure.
Growing Peanuts have become one of my favorite summer crops because they’re almost effortless once planted. They handle the Florida heat better than most vegetables, they fix their own nitrogen, and the payoff is something you can roast, boil, or save for seed next season. Watching those little pegs dive into the soil and pulling up a cluster of homegrown peanuts never gets old. It’s one of those garden moments that makes you feel like a kid again.