Last Updated on April 16, 2026 by Homegrown Florida
Tomatoes are one of those crops that make people feel either wildly confident or completely defeated. Usually both in the same season.
I’ve been growing tomatoes here in Central Florida for 10 years, and in that time I’ve probably grown close to a hundred different varieties. I’ve tried the hacks, the tips, the tricks, the “must do” methods, and the things people swear will double your harvest. Some of them helped. Some of them made no difference at all. And a few just added extra work for no real reason.
So if you want to grow tomatoes from seed in Florida, this is the process I actually use now. Not the perfect textbook version, not the northern gardening version, just what has worked for me after a lot of trial and error.
Table of Contents
This post may contain affiliate links. Read full disclosure here.
Timing Matters More Than Almost Anything Else
If you get the timing wrong with tomatoes in Florida, the rest of your effort barely matters.

Up north, gardeners are mostly racing against frost. Down here, we are balancing between frost and heat. That is what makes tomatoes in Florida so tricky. Plant too early and you risk cold damage. Plant too late and your plants may survive just fine, but the flowers stop setting fruit once temperatures get consistently too hot.
For North Florida and the colder parts of Central Florida, I go by the last predicted frost date. I personally like using the 50 percent frost risk point instead of the super conservative dates because waiting too long can cost you part of your tomato season. Once I have that date, I count backward four to six weeks to know when I need to start my seeds.
For South Florida, where frost is less of an issue, the better thing to watch is heat. Once you start getting consistent temperatures around 90 degrees, pollination becomes unreliable. So I count backward from that point using the days to harvest on the seed packet, then back up another four to six weeks for seed starting.
If all of that sounds annoying, that is because it kind of is. Tomato timing in Florida is not as simple as just “start in spring.” But if you get this piece right, everything else gets easier.
Choosing the Right Variety Can Save You a Lot of Heartbreak
This is one of the biggest mistakes I see gardeners make with tomatoes. They choose a variety based on what sounds good, what looks pretty in a catalog, or what happened to be on the shelf at the nursery. Then they wonder why it struggled.
Tomato varieties matter so much more than people realize.
Some are bred for heat. Some are better for cool weather. Some can handle more shade. Some need full blasting sun and still sulk. Some do great in sandy soil. Some hate humidity. Some are built for short seasons and some want to grow into giant monsters if you let them.
They really are like people. Every one is different.
At this point, I have a handful of varieties I trust because they have done well for me over and over again. A few from my recent planting were Silver Fir Tree, Beefy Purple, Black Seaman, Indigo Kumquat, 10 Fingers of Naples, Bella Rosa type tomatoes, Better Boy, Large Red Cherry, Koala, and Red Currant. Some are heirlooms, some are hybrids, and I care a lot less about that than I do about whether they actually perform well in my climate.
The more specific your climate challenges are, the more important variety selection becomes. A tomato that is incredible in one garden can be a complete disappointment in another.
Growing Tomatoes From Seed

I start all of mine from seed because it gives me better control over timing and variety selection.
By the time I transplant, I want a strong seedling with a good root system and enough top growth to handle the move, but not one that has become root bound or stretched and miserable from being in a cell too long.
Tomatoes grow quickly from seed, so this stage usually does not feel too bad. What matters more is not letting them get too far ahead of your transplant date.
You want to be growing plants for the moment they need to go out, not growing giant plants indoors because you got excited too early.
Hardening Off Is Not Just for Cold Climates
This is one of the biggest mistakes gardeners make, especially in Florida.
A lot of people think hardening off only means getting plants used to cold weather. That is not what it means. Hardening off means getting a plant used to the environment it is about to live in.
That includes sun, wind, temperature swings, and the general intensity of being outdoors.
A tomato seedling that has been started inside, under lights, in an AeroGarden, or even in a protected nursery area is not ready to be dropped straight into your garden just because the weather looks nice. Your sun is different. Your wind is different. Your backyard is different.
When I harden off tomatoes, I do it in stages. First I bring them outside into full shade during a time of day when the temperature is closest to what they have been used to indoors. If it is winter and my house is around 70 degrees, I choose a part of the day outdoors that feels similar.
Then I gradually move them into brighter conditions. First dappled light, then a little morning sun, then more exposure, until they can handle full sun and normal garden conditions without flopping over in protest.
If they start looking stressed, I bring them back in or move them to a gentler spot and slow down. Tomatoes are dramatic. They really do act like one bad day has ruined their entire lives. But if you take your time here, the transplant shock later is so much less.
Transplanting Without Overcomplicating It
Once the plants are hardened off, transplanting is actually the easy part.

I dig my holes, add my fertilizer, and get them in the ground. And yes, I know tomatoes come with all kinds of instructions about burying them deep, planting them sideways, making giant trenches, and all the rest of it.
I have tried them deep. I have tried them sideways. I have tried them at normal planting depth.
Honestly, I have never seen enough of a difference to justify acting like one method is the only correct way. If you want to bury them a bit deeper, that is fine. It does not hurt anything. But if you just want to plant them normally and move on with your life, they can do just fine that way too.
One thing I do care about is not planting too close to the edge of a raised bed. The edges heat up faster, and hot roots mean more stress. So I like to come in a few inches from the sides when possible.
I also pay attention to spacing based on the variety. Big indeterminates need more room. Dwarf or determinate types can be handled differently. That matters much more to me than whether I planted the stem two inches deeper than someone on the internet told me to.
What I Put in the Hole
At transplant time I usually use Tomatotone by Espoma. That is one of my favorites because it is simple and works well.
You can absolutely get more detailed with amendments and build your own blend using compost, blood meal, bone meal, kelp meal, and even potash if needed. But if you want a straightforward option, a good tomato fertilizer gets the job done.
I also sometimes add mycorrhizae. I have seen enough benefit with tomatoes specifically that I still like using it, even though they can grow just fine without it.
What really matters most, though, is knowing what your soil actually needs.
Soil Testing Changed the Way I Fertilize
For a long time I guessed.
I thought I had one deficiency, then another, then another. I was treating symptoms based on what I read online and what I thought I saw in the leaves. Turns out I was wrong.
A soil test showed me I had a potassium deficiency, but also excesses in other areas because I had been overloving my soil. That was a humbling moment.
Now I am a huge believer in soil tests because they save so much guesswork. Instead of throwing random products at your bed and hoping for the best, you get an actual answer.
So when I say “I think my beds are probably fine,” I do not mean I looked at the soil and decided it looked rich. I mean I tested it.
That matters.
Supporting the Plants Early
Once tomatoes go in the ground, I want their support system ready as soon as possible.
How you trellis tomatoes depends on the kind of tomato you are growing. Dwarf and determinate tomatoes do fine in cages because they hit a certain size and stop. Those are the plants cages were actually made for.
Indeterminate tomatoes are a different story. They just keep growing, and standard cages are usually laughably inadequate for them.
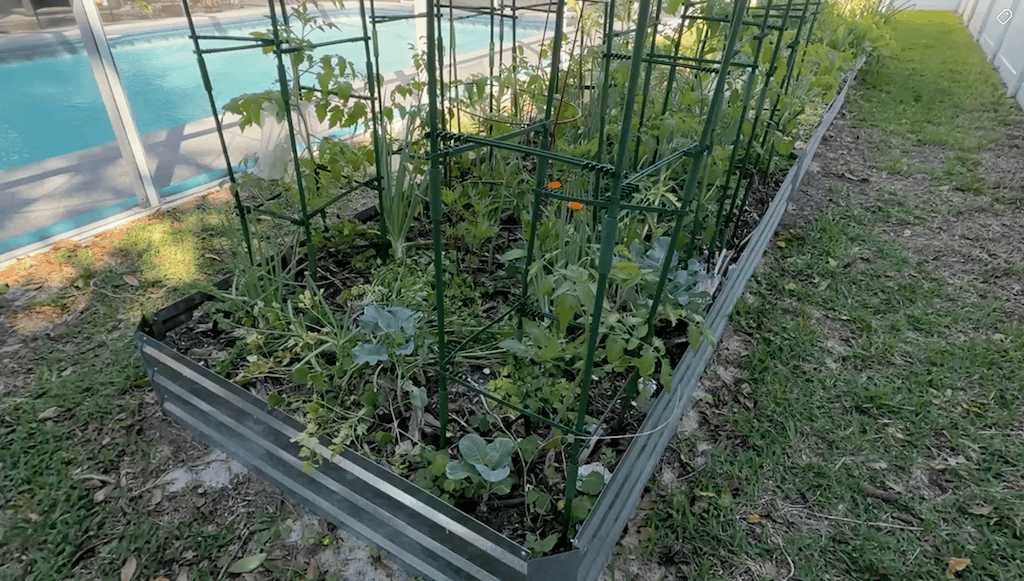
For indeterminates, I prefer tall supports I can build up as they grow. I like sturdy vertical systems that can be expanded because once a healthy indeterminate gets going, it is not going to politely stay in a four foot cage.
The biggest mistake with support is waiting too long. If you wait until the plant is already sprawling and heavy, it becomes much harder to train and much easier to break.
Mulch, Water, and the First Few Weeks
After transplanting, the first few weeks are mostly about helping them settle in.
I like to mulch them as soon as I can because mulch keeps roots cooler, helps moisture stay more even, and reduces stress fast. If I do not have mulch on hand right away, I know I need to come back and get that done soon.
Watering is important during establishment, but after that I let them grow into a more normal pattern. Tomatoes are much easier to manage when they have consistent moisture, not constant wet feet.
If they need a little extra water right after transplanting, I give it to them. After that, I start backing off and letting the roots do their thing.
Care After Transplanting
Once they are established, you are past the hardest part.
The fertilizer I put in the hole usually carries them for about two months. After that, I watch for flowering as my reminder that it is time to feed again.
I prefer granular fertilizer over constant liquid feeding because I am just not interested in dragging out fish fertilizer every week or two if I do not have to.
Beyond that, tomato care becomes more observational.
I keep them tied up and supported. I remove leaves that are clearly diseased. I tap the flowers sometimes to help with pollination. I watch their growth and respond as needed.
And if you live somewhere that gets really intense sun, this is where placement matters. Right after transplanting, full sun feels great to them. Two months later, it can be brutal. That is one reason I often plant mine where they will eventually get a bit of relief as the season heats up.
The Goal Is to Make It Easy on Yourself
At this point, I do not want to do tomato gardening the hard way anymore.
I want varieties that are proven. I want good timing. I want seedlings that are properly hardened off. I want the support system ready before the plants need it. And I want my fertilizer choices based on actual soil information, not panic.
That is what has made the biggest difference for me.
There are always more hacks people will throw at tomatoes. Some may help in very specific situations. But the things that consistently matter are timing, variety choice, hardening off, support, and not guessing at your soil.
If you get those right, tomatoes become a whole lot less dramatic.
If you’re looking for even more detailed guidance on growing veggies here in Florida—like when to start seeds, how to manage pests, and what varieties really thrive—don’t forget to check out my ebook! It’s got a chapter for every single vegetable and is packed with everything I’ve learned over the years gardening in Florida.