Last Updated on October 7, 2026 by Homegrown Florida
Raised bed gardening is one of my favorite ways to grow vegetables in Florida, but there are a few decisions you want to get right before you start filling beds with soil.
And I say that as someone who has gotten some of them wrong.
Over the years, I’ve grown in galvanized steel raised beds, containers, grow bags, vertical gardens, and directly in our native Florida sand. I’ve also made the mistake of putting raised beds where I couldn’t easily access the back, underestimated how much soil they would take to fill, and watched brand-new beds sink dramatically during their first year.
The good news is that once you understand how to set up a raised bed, they become much easier and less expensive to maintain.
You don’t need to buy hundreds of dollars of bagged soil every year. You don’t need an elaborate irrigation system on day one. And you definitely don’t need to follow every complicated raised bed recipe you find online.
Here’s what I would consider if I were starting a Florida raised bed garden from scratch today.
Table of Contents
This post may contain affiliate links. Read full disclosure here.
Why Raised Bed Gardening Work So Well in Florida
One of the biggest advantages of raised beds in Florida is that you get to build the soil instead of trying to completely change the soil already in your yard.
Much of Florida has very sandy soil. Sand drains quickly, doesn’t hold nutrients particularly well, and can make growing some vegetables more difficult. A raised bed gives you control over that growing environment.
You can add compost and organic matter, improve water retention, replenish nutrients, and continually build the soil over time. Raised beds are also easier to mulch and amend than a large in-ground garden. But first, you need the actual bed.
Choosing the Right Raised Bed
There are three common materials I would consider for a traditional raised bed:
- Galvanized steel
- Wood
- Cinder blocks
They can all work. The biggest differences are cost, longevity, appearance, and how much work you’re willing to put into building them.
Galvanized Steel vs. Wood vs. Cinder Blocks
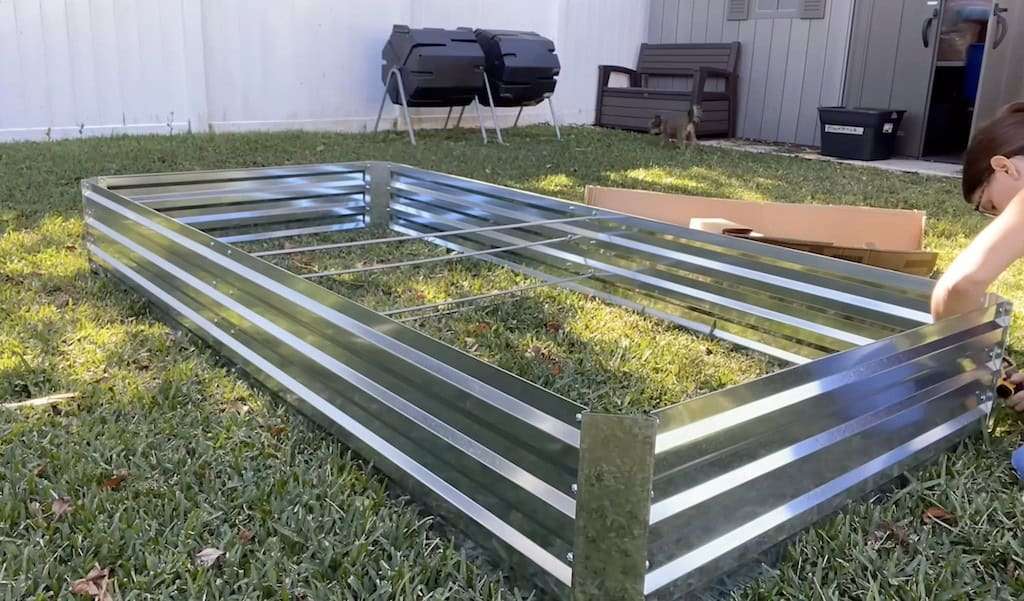
Galvanized steel is what I use throughout most of my garden. My oldest beds have been outside in Florida for years and have held up incredibly well. Eventually the coating can deteriorate and the metal can rust, but I’ve been very happy with their longevity. They’re also easy to assemble and available in tons of sizes and shapes.
Wood can be inexpensive and easy to customize, but Florida is rough on it. Between our rain, humidity, heat, and insects, untreated wood can break down surprisingly fast. Even cedar doesn’t last here the way it might in a drier climate. If I were building wooden beds in Florida, I’d consider pressure-treated lumber because I’d want more than a year or two before rebuilding the entire thing.
Cinder blocks are extremely durable and can potentially outlast both wood and galvanized steel. The downside is the labor. An 8×4 bed can require dozens of blocks, and somebody has to move every single one of them.
For me, galvanized steel has been the best balance of longevity, cost, and convenience.
How Deep Should a Raised Bed Be?
I recommend at least 12 inches of growing depth for a raised bed. Most vegetables can grow perfectly well in that amount of soil, particularly if the bed is open to the ground underneath so roots can continue growing down when necessary. Eighteen inches is even better.
And if I were starting over, I would seriously consider 24-inch-tall beds for one very scientific reason: I’m getting tired of bending over. The additional height isn’t necessarily required by the vegetables. It’s for me. If bending, kneeling, mobility, or back problems are considerations for you, spending a little more on taller beds may be worth it.
Choosing the Best Size and Shape
Whether you choose a 4×4, 6×3, 8×4, or another configuration depends mostly on your available space. A four-foot-wide bed works because most people can reach approximately two feet into it from either side. If you make the bed much wider, suddenly you’re climbing into it to reach the middle.
But there’s one measurement people often forget.
Don’t Forget Space Around Your Raised Beds
Leave yourself walkways. I have raised beds near my pool cage that I placed right up against the screen without enough room behind them. I thought I was maximizing my growing space but I was actually creating a problem that I would continue dealing with for years. Anytime we need to maintain the screen or I need access to the back of those beds, it’s a pain.

Think beyond what the garden will look like when you first install it. Can you walk around the beds? Can you reach the plants? Can you repair a fence or structure behind them? Can you maneuver a wheelbarrow or Gorilla Cart through the area? A few extra feet of walkway may seem like wasted growing space until you need it.
What to Put Under a Raised Bed
My raised beds are open to the native soil underneath. I don’t have a significant problem with animals digging into them, so I don’t need a permanent barrier.
If you have voles, moles, or other digging animals, consider installing hardware cloth across the bottom before filling the bed. The other problem is grass.
Dealing With Florida Grass Before You Fill the Bed
For my St. Augustine grass, several layers of cardboard underneath the bed have been enough to smother it. I put down approximately three or four layers and then fill the bed directly over the cardboard. Eventually the cardboard decomposes.
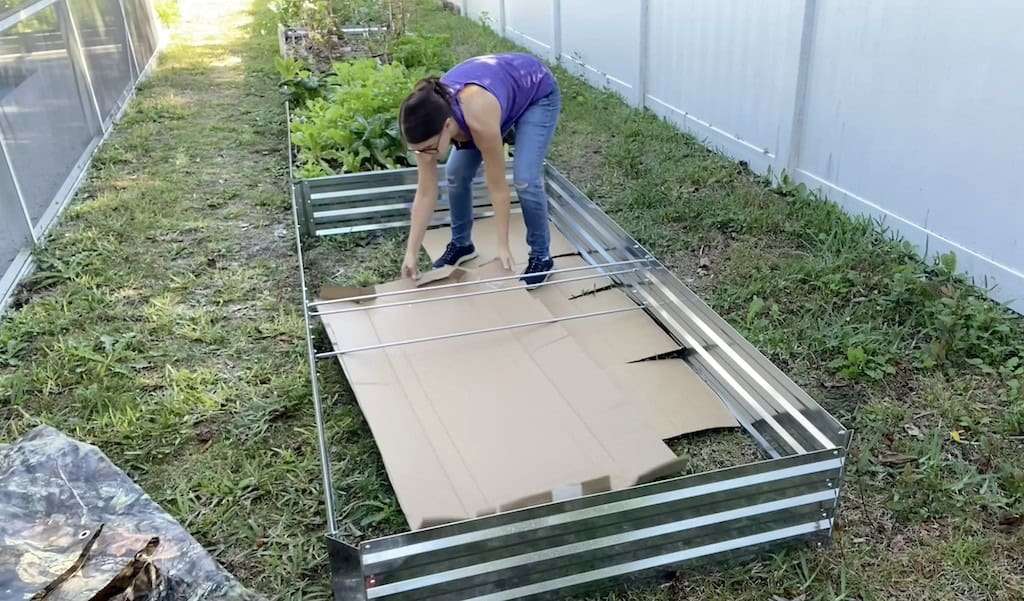
More aggressive grasses may require a different approach. Bermuda grass and torpedo grass can be incredibly persistent. If you’re dealing with one of those, I would seriously consider a more substantial barrier before filling the bed. Once aggressive grass works its way throughout a filled raised bed, getting it back out is incredibly difficult. Do that battle before you add a cubic yard of soil on top of it.
Where to Put Your Raised Beds
People spend a lot of time debating whether raised beds should run north-to-south or east-to-west. I have both.
In my Florida garden, I don’t notice enough of a difference to make orientation my first consideration. I’m much more interested in how many hours of sun that location receives.
How Much Sun Does a Florida Vegetable Garden Really Need?
Here in Florida, full blazing sun all day isn’t always an advantage. During our hottest months, half-day sun can actually work beautifully. Plants can receive the light they need without sitting in brutal afternoon sun for the entire day.
One of the easiest ways to evaluate a potential garden location is also completely free. Take pictures.
Pick a day when you’re home and take a picture of the area every couple of hours. You’ll quickly see when sunlight reaches the space, when shade begins moving across it, and whether nearby trees or buildings create more shade than you realized.
Remember that this changes seasonally. My winter sun comes through the garden at a very different angle than my summer sun, creating shade in places that don’t have it during summer. Sun-tracking apps can help you anticipate those seasonal changes before permanently installing a bed. I like to use ShadeMap
East-to-West vs. North-to-South Raised Beds
If I had to choose, I tend to like north-to-south beds in my Florida garden because one side can receive stronger sun during part of the day and the other side later.

Orientation becomes more important when you’re adding tall structures such as arch trellises. Ideally, I’d rather have an arch spanning a walkway between beds than covering plants growing underneath it. Once that trellis is covered in vines, it creates a significant amount of shade.
The bigger lesson is to think about where shadows will fall once your garden is mature, not just when all the plants are six inches tall.
Plan Your Watering Before You Place the Beds
Before permanently placing a raised bed, figure out where the water is coming from. You don’t want to discover afterward that your nearest faucet is 100 feet away.
When we had our sprinkler system repaired, we already knew where our raised beds were going. We had water lines brought into those areas so I could eventually connect irrigation.
You don’t have to do anything that elaborate. You could use rain barrels, a garden hose, or simply position the beds close to an existing water source.
The important thing is making watering convenient. Anything you have to do repeatedly in the garden should be easy enough that you’re actually going to do it.
Three Ways to Water a Raised Bed
You can make raised bed irrigation as simple or complicated as you want.
Hand watering is perfectly fine, particularly if you’re just getting started. A watering can or hose works. Don’t spend hundreds of dollars automating a garden before you even know whether you enjoy gardening.
Soaker hoses are a relatively inexpensive step toward automation. Connect one to a hose and timer and you can slowly water the entire bed. My experience in Florida, though, is that soaker hoses don’t last particularly long. Eventually they deteriorate and start spraying water from places they shouldn’t.
Drip irrigation is what I ultimately prefer. It takes more work initially, but once it’s installed, watering becomes dramatically easier. But you don’t need drip irrigation to be a successful raised bed gardener. It’s an upgrade you can make later.

How to Fill a Raised Bed
This is where people discover that the bed itself wasn’t necessarily the expensive part. Filling it is.
There are basically two approaches. There’s the fast way, and there’s the cheap way. Unfortunately, I have yet to discover the fast, cheap way.
The Fast Way: Buy Bulk Soil
If you want your raised bed filled and ready to plant immediately, find a local landscape supplier or nursery that sells soil and compost in bulk. I have used a 50/50 mixture of compost and soil from Whitwham Organics for many years.
An 8×4-foot raised bed that’s approximately one foot deep requires roughly one cubic yard of material. A two-foot-deep bed would need roughly twice that amount. For different dimensions, use a raised bed soil calculator before ordering.
Buying bulk is dramatically easier and generally less expensive than trying to fill the same space with bags.
I have filled a bed with bagged soil before. Never again if I can avoid it. Depending on the bag size, you’re potentially moving a couple dozen bags for a single bed. Multiply that by several beds and you’ve created an expensive workout program.
Bulk soil can still cost a significant amount, especially if you need delivery, but if speed is your priority, that’s the route I’d choose.
The Cheap Way: Fill Most of the Bed With Free Organic Material
If saving money is more important than having perfect soil immediately, use bulky organic material to take up most of the volume.
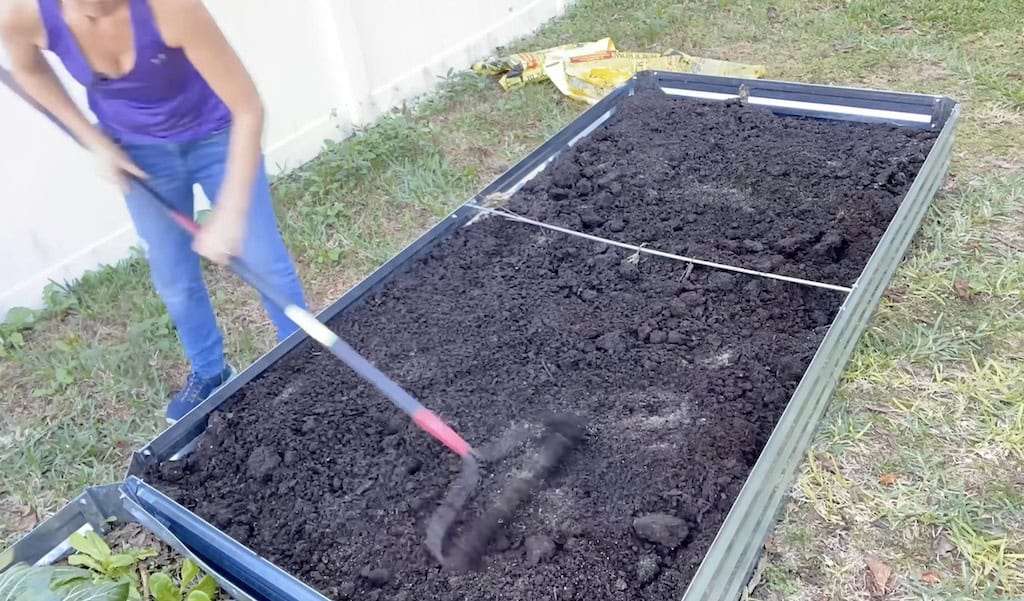
I’ve used things like:
- Cardboard
- Branches and tree trimmings
- Wood chips
- Unfinished compost
- Used potting soil
- Leaves and other yard debris
You don’t need my exact combination.
The basic idea is to stop treating every inch of a raised bed as though it needs to contain expensive bagged potting soil.
Put cardboard over the grass first. Then use free woody organic material to fill a large portion of the bed. Wood chips can make up roughly 75% of a new bed, with the upper several inches filled with good compost or another quality growing medium.
Check your county for free wood-chip or composted-mulch programs. Local tree companies may also be willing to drop chips at your property rather than paying to dispose of them, and services such as ChipDrop may be available in your area.
Just understand what you’re signing up for. A tree company isn’t bringing you one cute little bag of mulch. You may get a mountain.
Why a New Wood-Filled Bed Needs Extra Nitrogen
There’s a trade-off to the cheap method. All that woody material has to decompose. During that first year, I fertilize these beds more aggressively, particularly with nitrogen. I may apply granular fertilizer monthly and supplement with liquid fertilizer if the plants show that they need it.
After that first year, things change dramatically. The wood starts breaking down into beautiful organic matter, and the bed begins behaving much more like mature garden soil.
Almost all of my raised beds were originally filled this way, and I successfully grew vegetables in them during that first year. You just have to understand that you’re growing in a soil-building system that isn’t finished yet.
What Happens When Your Raised Bed Starts to Sink
You fill your new bed beautifully. Then you come back later and wonder where half of it went.
This is normal.
Organic material decomposes and settles. Some material works its way into the sandy soil underneath. New beds can lose a surprising amount of volume during the first year.
Mine sank dramatically when they were new. Now that my beds have been established for years, they may only need a few inches added each year. At that point, I’m not really “refilling” them anymore. I’m continually building the soil.
How to Refill a Raised Bed Without Buying More Soil
Compost is my number-one material for replenishing established beds.
I make my own compost, and one of the reasons I’ve expanded my composting setup is because I can now produce enough material to replace much of what my beds lose each year.

Depending on your soil, you can also incorporate:
- Native soil or sand
- Perlite
- Vermiculite
- Organic material from the garden itself
Be careful with native Florida sand. Adding some can provide inexpensive volume and drainage, but add too much and you’ve essentially recreated the sandy soil you built the raised bed to avoid. You can also introduce root-knot nematodes or other soil problems when moving native soil into a raised bed. I’ve done it, and I’ve worked through the consequences, but it’s something you should know before mixing it in.
Perlite or vermiculite can be useful when a bed has become extremely rich in compost and organic matter and holds too much water during our rainy season. The goal is balance.
How I Prepare an Existing Raised Bed for a New Season
Once a bed is established, my seasonal preparation becomes much simpler. First, I clear out the previous crop. I don’t remove every root. In fact, when I’m growing cover crops, I intentionally leave a lot of the root system in place. Those roots become organic matter underground. Then I add compost to replace the volume the bed has lost.
After that, I address nutrients.
Start With a Soil Test
I don’t think we should automatically add every fertilizer amendment to every bed every season. Test first.
Your soil may not need phosphorus. It may already have plenty. Continually adding bone meal because somebody’s raised bed recipe says every garden needs bone meal can eventually create an imbalance.
My own soil tends to need nitrogen and potassium, so those are frequently what I’m replacing.
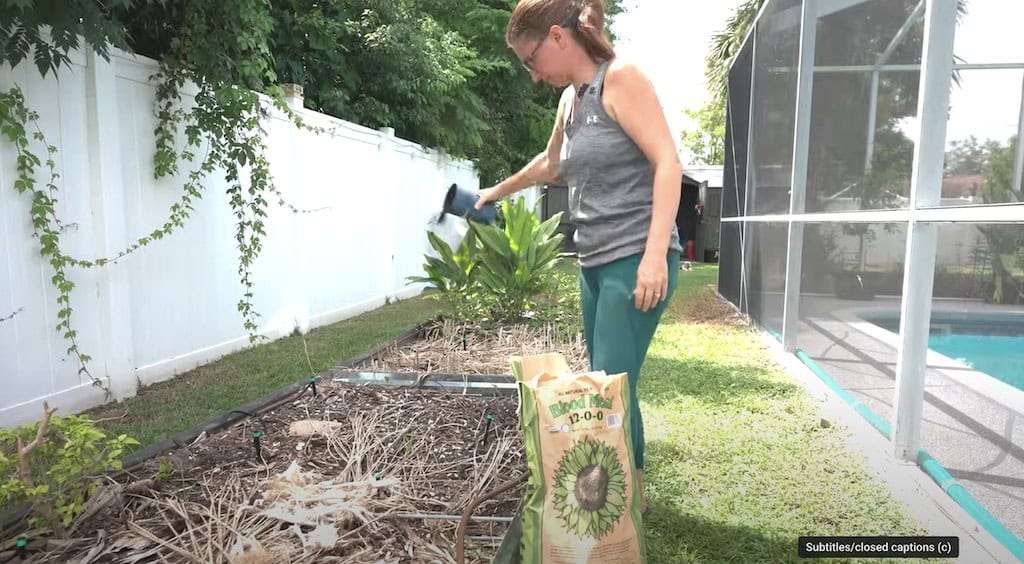
That might mean adding:
- Blood meal for faster nitrogen
- Feather meal for slower-release nitrogen
- Potash or Kelp meal for potassium
- Bone meal for phosphorus
I like combining faster and slower sources of nitrogen so everything isn’t available at exactly the same time.
If you don’t want to individually amend nutrients, that’s fine too. Use a good granular all-purpose fertilizer according to the label. The point isn’t to own every amendment at the garden center. It’s to give your soil what it needs.
Growing Your Own Free Soil Amendments
This is where my summer garden has become incredibly useful. Instead of leaving raised beds empty during difficult parts of the year, I can grow plants specifically to improve the garden.
I use crops such as:
- Sunn hemp
- Cowpeas
- Peanuts
- Marigolds
Some have additional benefits, but one thing they all give me is biomass. Biomass is basically plant material I can put right back into the garden. Instead of buying bags of material to fill my beds, I can grow some of that material myself.
Why I Grow Sunn Hemp and Other Cover Crops
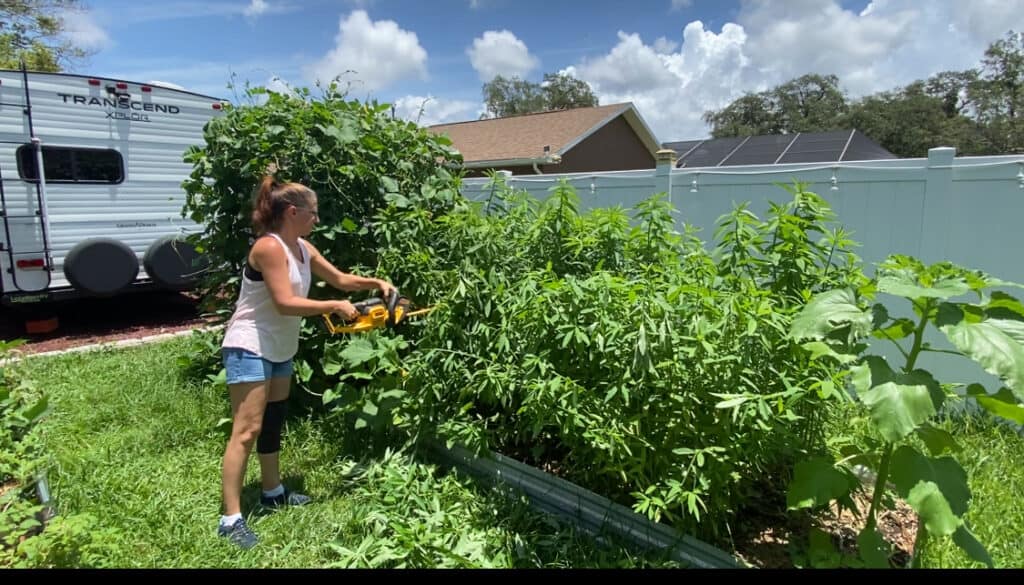
Sunn hemp has become one of my favorite summer cover crops because it produces a tremendous amount of plant material in a relatively short amount of time while also being a legume. When I’m ready to prepare the bed for the next season, I don’t yank the entire plant out. I cut the tops into smaller pieces with pruners, leaving the lower portion and roots in the soil whenever possible.
Those roots are valuable organic material. There’s no reason for me to drag all of that out of the soil just to replace it with organic matter from somewhere else.
Chop-and-Drop: Turning Old Plants Into Mulch and Organic Matter
After cutting down the cover crop, I’ll add compost to bring the bed back up to the appropriate level. This is also when I can add perlite, vermiculite, sand, or whatever nutrient amendments my soil test indicates I need. Then the plant material I just cut down goes right back on top.
That’s my mulch.
You can chop it into the soil if you prefer, but I like leaving it on the surface. It protects the soil while slowly decomposing and returning nutrients and organic matter to the bed. This is one of the reasons I love growing cover crops.
I grew the plant. The plant helped the soil while it was alive. Then I chopped it down and it became free mulch. Eventually that mulch becomes part of the soil.
That is a much more sustainable system to me than repeatedly removing everything from the garden and buying bags of material to replace it.
Planning What to Plant in Your Raised Beds
Once the bed is built, filled, watered, and amended, we finally get to the fun part.
Plants.
Before putting anything into the ground, think about how large each plant will eventually become. A tiny tomato transplant doesn’t look intimidating. A mature indeterminate tomato taking over half the bed is another story.
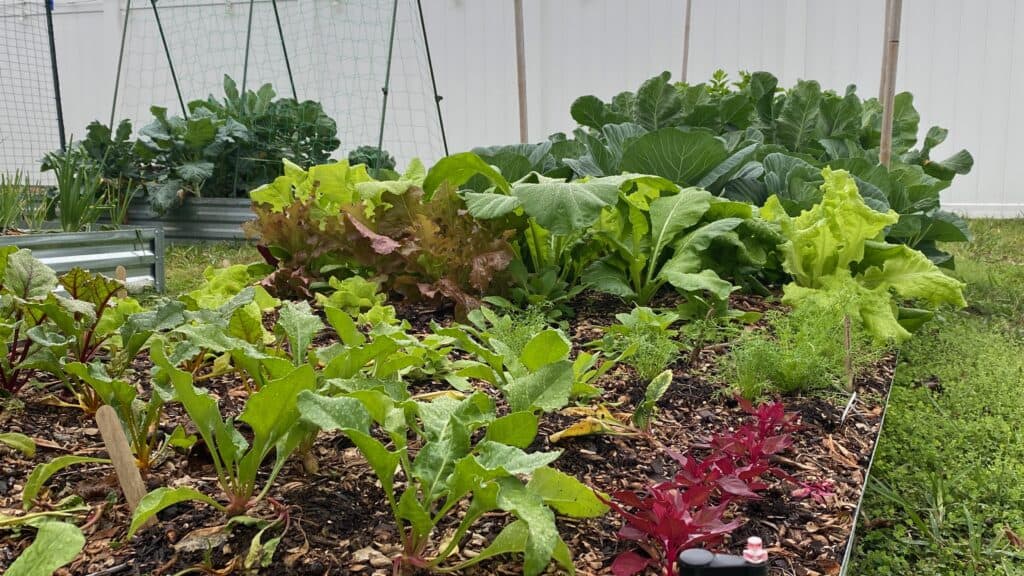
Think about:
- Mature plant height
- Mature plant width
- Trellis requirements
- Sun exposure
- Where shadows will fall
- Which crops will finish first
- Which plants attract similar pests and diseases
Tall crops and trellises can provide useful shade in Florida, but you don’t want them unintentionally blocking plants that need more light.
Tall Plants, Short Plants, and Trellises
Put climbing crops where you can support them without making the rest of the garden impossible to access. If you’re using an arch trellis between two raised beds, I’d rather have the arch cover the walkway than have vegetables growing directly underneath the entire structure. Once cucumbers, beans, or another vine completely covers that arch, you’ve created a shade structure. That can be fantastic if it’s intentional.
Plant Families and Pest Pressure
You’ll also hear a tremendous amount about companion planting and which vegetables supposedly love or hate each other. I don’t get too wrapped up in that.
Most vegetables can grow perfectly well beside other vegetables as long as they have enough space, sunlight, water, and nutrients. I pay more attention to plant families. If I put a huge concentration of plants from the same family together, pests or diseases that like that family can potentially move through them much more easily.
Spreading things around and mixing plant families can make more sense than worrying about whether two vegetables are supposedly “friends.”
How Raised Beds Compare With Containers
I’ve grown extensively in both raised beds and containers, and there are advantages to each. Containers are fantastic if you have limited space, need portability, rent your home, or just want to start small.
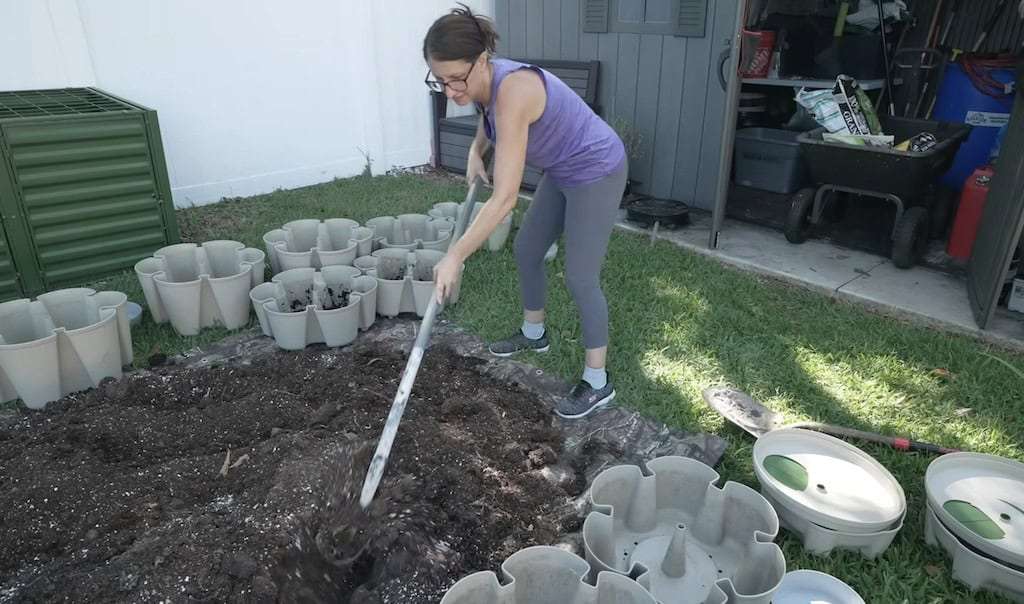
But containers have less soil volume, and that changes how they behave. In one experiment, I grew the same tomato variety in a raised bed and a container. The raised bed plant became larger, greener, and much more productive, while the container plant struggled more with nutrients and required much more frequent watering.
That doesn’t mean you can’t grow a fantastic tomato in a container. You absolutely can.
It does demonstrate one of the advantages of a raised bed. You have a much larger reservoir of soil, moisture, nutrients, and organic matter around the roots. That gives you more room for error.
Containers can dry out incredibly quickly in Florida heat, particularly dark-colored containers sitting in direct sun. Nutrients also wash through them more quickly because you’re watering so frequently.
Raised beds aren’t maintenance-free, but once you’ve built healthy soil in them, they can become surprisingly forgiving.
Build the Soil Once, Then Keep Improving It
The biggest thing I’ve learned from years of raised bed gardening is that you don’t need to start over every season. A raised bed should get better.
The first year may actually be the hardest, especially if you choose the inexpensive route and fill much of the bed with woody organic material. You’ll probably fertilize more. The bed will sink. You’ll add more compost. But while all of that is happening, you’re building soil.
By year two, those wood chips are decomposing. A few years later, you’re no longer filling an empty metal box. You’re maintaining an established ecosystem full of decomposed organic matter, roots, compost, microorganisms, and nutrients.
Now I can grow a sunn hemp crop through summer, chop it down, leave the roots, add my homemade compost, replace whatever nutrients my soil test tells me are missing, and use the plant itself as mulch. The garden starts providing some of the materials needed to maintain the garden. That’s ultimately what I want.
Start with a bed you can afford. Put it somewhere you can actually access and water it. Fill it using the method that makes sense for your budget. Don’t panic when it sinks. Add compost, grow biomass, mulch it, test the soil, and keep putting organic material back. You don’t need perfect soil on day one. You need a raised bed that you can keep making better every year.