Last Updated on September 24, 2026 by Homegrown Florida
Watermelons were my garden nemesis for years. The first time I tried grew watermelons in Florida, the vines took off and looked fantastic, but I didn’t get a single watermelon. The next year I figured out pollination and managed to get a few melons started, only to watch the plants decline before the fruit matured. Then I got the fertilizer right and fungal disease took over. After that came pickleworms. And when I finally managed to grow watermelons all the way to maturity, I picked them at the wrong time.
It took me about five years of trial and error to consistently grow watermelons that were actually ripe, sweet, and worth all the space those enormous vines were taking up.
The good news is that all those failures taught me quite a bit about what watermelons need, especially in Florida. Our long, warm growing season should make us fantastic watermelon growers, but it also comes with intense pest pressure, fungal disease, heavy rain, and nutrient-poor sandy soil. The longer a watermelon takes to mature, the more time there is for something to go wrong.
Over the years, I’ve changed the varieties I grow, how I fertilize them, how I handle pollination and pests, and even how I decide when they’re ready to harvest. Those changes have made watermelons considerably more reliable in my garden, and these are the five things that have made the biggest difference.
Table of Contents
This post may contain affiliate links. Read full disclosure here.
Why Watermelons Took Me Five Years to Figure Out
My first attempt was Sugar Baby watermelon planted from seed in a raised bed. The vines grew completely out of control, which made me think everything was going beautifully. Then I realized I wasn’t getting any fruit because the flowers weren’t being properly pollinated.
The following year, I started hand pollinating. That solved one problem, but the melons still didn’t make it to maturity because the vines declined. Fertilizing became another piece of the puzzle, followed by fungal disease and eventually pickleworms boring into the fruit.
By year four, I could actually get watermelons to maturity. Unfortunately, I hadn’t figured out when to pick them. I harvested some too early and others too late, which is particularly frustrating after you’ve spent months keeping the plant alive.
By year five, I finally started putting all those pieces together. Moon and Stars became one of my most successful varieties, Crimson Sweet matured earlier, and I harvested several fully ripe watermelons.
Since then, I’ve continued experimenting, and my approach has changed again. One of the biggest changes has been realizing that success isn’t necessarily about growing the biggest watermelon I possibly can. In Florida, sometimes the watermelon that gets from flower to harvest the fastest has a major advantage.
Tip #1: Choose a Watermelon Variety That Can Beat Florida’s Problems
Watermelon varieties vary tremendously in fruit size and how long they need to mature. That matters anywhere, but I think it becomes especially important in Florida.

A huge watermelon needs to remain on the vine much longer than a small personal-size melon. During that extra time, we’re exposing it to Florida’s heavy rain, splitting, pickleworms, fungal diseases, and every other problem summer decides to throw at us.
The faster I can get from pollination to ripe watermelon, the fewer opportunities there are for something to ruin it.
Large, Icebox, and Personal-Size Watermelons
I think about watermelons in three general size categories.
Large watermelons are the big boys, including varieties like Jubilee and Congo. These can produce impressive fruit, but they require more time to reach full size and ripen. If your goal is a giant watermelon, that’s perfectly fine. Just understand that you’re signing up for a longer season.
Then there are medium or icebox watermelons. These are generally somewhere around 10 to 20 pounds, although I’ve had Moon and Stars get closer to 30 pounds. Crimson Sweet is another good example of this category.
The third group is the small personal-size watermelon. These have become my favorite, and not just because they’re faster.
Some varieties I’ve grown or would consider include:
- Jubilee
- Congo
- Moon and Stars
- Crimson Sweet
- Sugar Baby
- Onza
Why Smaller Watermelons In Florida Have Become My Favorite
I love watermelon, but my husband and I don’t necessarily need 30 pounds of it sitting in the refrigerator on a random Tuesday.
I’ve freeze-dried watermelon before, and it works, but it’s more of a novelty for us than something we regularly eat. A smaller melon is much more practical. We can harvest one, eat it over a day or two, take a little break from watermelon, then harvest another when we’re ready.
More importantly, the smaller varieties can mature faster and produce multiple fruit. That shorter growing period gives Florida’s pests, diseases, and weather less time to interfere.
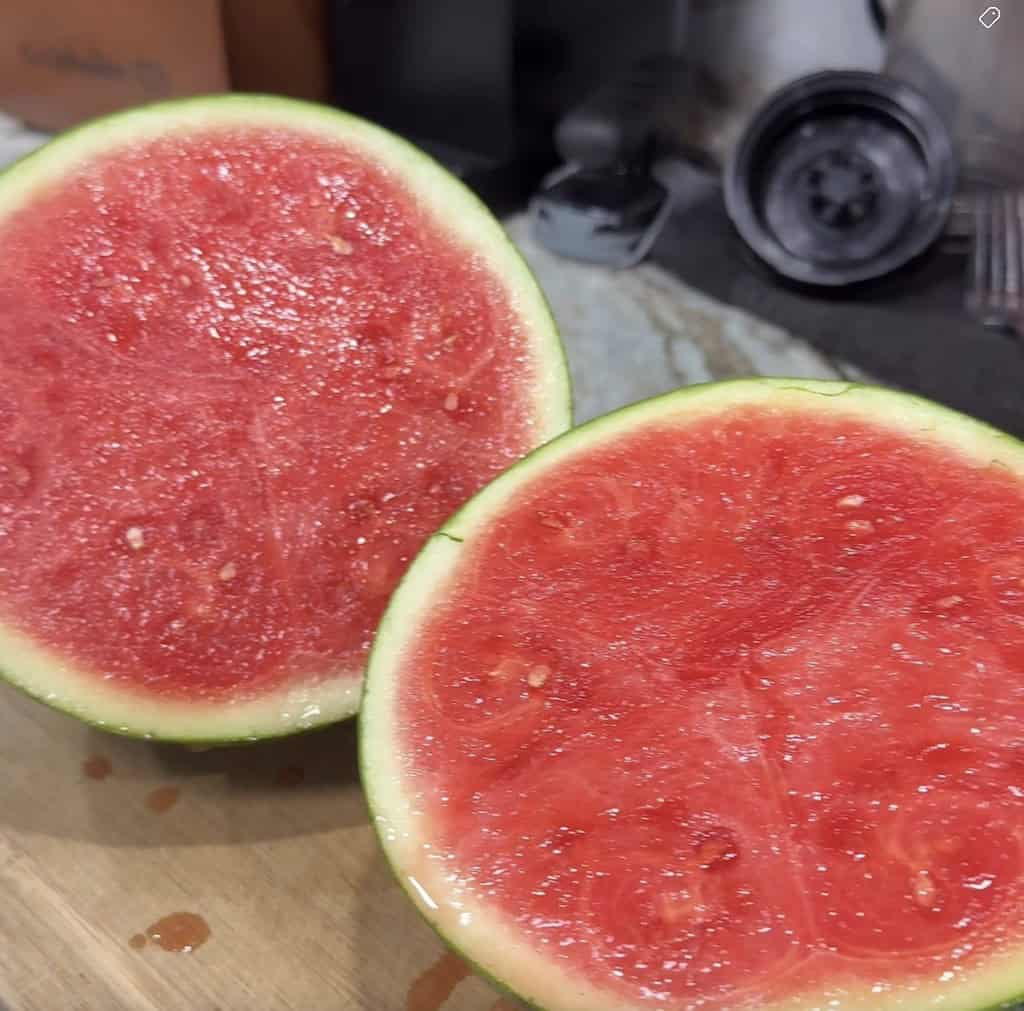
Onza has become my current favorite. It’s a small seedless watermelon, and one plant produced eight melons during my recent trial. The fruit ripened quickly, and when I cut into one after carefully watching the ripeness indicators, it had exactly what I wanted: a crisp texture with plenty of sweetness.
That doesn’t mean I’m giving up on Moon and Stars or larger watermelons. But if someone has struggled to get watermelons all the way to harvest in Florida, I’d seriously consider trying a smaller, faster variety before assuming you can’t grow watermelons.
Tip #2: Give Watermelons the Nutrients They Need to Grow Fast
Watermelons aren’t a crop I would plant in poor Florida sand and expect to figure things out on their own.
Our native sandy soil tends to be low in nutrients, and watermelons need enough nutrition to grow vigorous vines, produce plenty of flowers, develop fruit, and then feed that fruit all the way to maturity.
Slow, weak growth creates problems throughout that entire process. If the plant doesn’t grow well, it may not flower well. Without plenty of flowers, pollination becomes more difficult. And once you finally have a developing watermelon, the plant needs enough resources to grow and ripen it.
You can provide those nutrients with fertilizer, compost, or a combination of the two.
Granular vs. Liquid Fertilizer
One of my go-to fertilizers for watermelons is actually tomato fertilizer. Tomatoes and watermelons are both fruiting plants, and many fertilizers formulated for tomatoes also work well for squash, cucumbers, peppers, eggplants, and melons.

I use both granular and liquid fertilizers, but they serve slightly different purposes.
Granular fertilizers provide nutrients over a longer period as they break down. Tomato-tone from Espoma is one I’ve used, but there are similar granular options from brands such as Down to Earth and Dr. Earth.
Liquid fertilizer makes nutrients available much faster. Fish-based and tomato-focused liquid fertilizers can work well, although I’d pay attention to the nutrient analysis rather than simply grabbing any bottle labeled fish fertilizer. Some fish fertilizers are heavier in nitrogen than I want for a plant I’m trying to encourage to flower and fruit.
If you prefer synthetic fertilizer, that’s another option. The important part isn’t whether the nutrients came from an organic bag, a synthetic fertilizer, or compost. The watermelon still needs adequate nutrition.
Growing Watermelons Without Purchased Fertilizer
You can absolutely grow watermelons without purchased fertilizer, but I wouldn’t interpret that as planting them directly into nutrient-poor sand and doing nothing.
If I wanted to grow them primarily with compost, I’d build a substantial mound using high-quality finished compost. I’m talking about homemade compost, bulk compost from a reliable local source, or properly composted animal manure rather than depending on a thin layer of bagged compost.
For particularly sandy Florida soil, I’d build that mound roughly a foot tall. The goal is to give the roots a large volume of nutrient-rich material to grow through before they reach the native sand underneath.
Over the long term, you can also improve sandy soil with repeated additions of compost topped with thicker layers of wood chips or other organic mulch. As those materials break down, they’ll gradually improve the soil underneath. That’s a long-term soil-building strategy, though, and depending on where you’re starting, meaningful improvement can take six months to a year or longer.
For the watermelon you’re trying to grow right now, make sure it has enough nutrition right now. These plants already take a while to produce. We don’t need nutrient deficiencies making the process even slower.
Tip #3: Make Sure Your Watermelons Are Actually Getting Pollinated
Pollination was the first major watermelon lesson I had to learn.
Watermelon plants produce separate male and female flowers. A male flower is simply a flower attached to a stem. A female flower has what looks like a tiny watermelon underneath it.

That little watermelon is not proof that you have a pollinated fruit.
It’s the immature ovary, and it still needs pollen transferred from a male flower to the female flower. Bees normally do the work for us. Pollen sticks to their fuzzy bodies while they’re visiting a male flower, then some of it is transferred when they visit a female.
If pollination is successful, the flower eventually closes and drops away while the little watermelon begins rapidly increasing in size. You can usually tell within a couple of days because a successfully pollinated fruit starts growing surprisingly quickly.
If it wasn’t pollinated, that little watermelon will stop growing, turn yellow, shrivel, and eventually rot.
A lot of gardeners see that happen and assume they have a pest, disease, or fertilizer problem. Sometimes the watermelon was simply never pollinated.
Why You May See Male Flowers for Weeks Before Female Flowers
Don’t panic if your watermelon starts flowering and every flower appears to be male.
Male flowers generally arrive first, and there will be considerably more of them than female flowers. I see something in the neighborhood of a 10:1 ratio on my plants.
The plant may produce male flowers for the first two to four weeks before you start seeing females. Those early flowers help attract pollinators to the plant before the female flowers arrive.
So if your vine looks healthy and is covered in male flowers, give it some time. Female flowers should follow.
How to Hand Pollinate Watermelons
If you don’t have enough pollinators visiting your garden, hand pollination is easy.
You can transfer pollen using:
- A small paintbrush
- A cotton swab
- The male flower itself
For the last method, remove a freshly opened male flower and peel back the outer petals to expose the pollen-producing center. Gently rub that against the center of an open female flower.
Do it in the morning while the flowers are open and receptive. Then watch the tiny watermelon over the next couple of days. If it starts noticeably increasing in size, you’ve probably succeeded.
How Seedless Watermelons Get Pollinated
Seedless watermelons create some confusion because people sometimes assume “seedless” means genetically modified. The seedless watermelons I’m talking about aren’t GMO watermelons.
Standard seeded watermelons are diploid, meaning they have two sets of chromosomes. Breeders can create tetraploid plants with four sets of chromosomes, then cross a tetraploid with a diploid to produce a triploid watermelon.
The resulting triploid plant produces the seedless watermelon we’re familiar with. You may still find those soft little white seed structures inside, but they aren’t mature, viable seeds.
A simple analogy is a horse and donkey producing a mule. The offspring exists, but it’s sterile. You can’t save seeds from your seedless watermelon and grow the same watermelon next year. The original parent lines have to be crossed again to produce new triploid seed.
Seedless varieties also still require pollination to set fruit, which is why seed companies may recommend planting a compatible seeded pollinator variety nearby.
Tip #4: Manage Pests Without Spraying Everything
Florida watermelon season overlaps with some of our highest pest pressure of the year. Whiteflies, aphids, spider mites, thrips, mealybugs, caterpillars, and plenty of other creatures may eventually find your plants.
I don’t automatically treat all of them.
My garden has a lot of diversity. I grow vegetables alongside flowers, herbs, fruit trees, native plants, cover crops, and other flowering plants. That diversity brings in predator insects, and those predators handle a surprising amount of pest control for me.
If I immediately spray every aphid that appears, I may kill beneficial insects along with the pests or remove the food source that would have attracted those predators in the first place.
Sometimes doing less really does work better.
When I Use Insecticidal Soap
There are situations where I intervene. Plants growing inside my pool cage, for example, can develop more problems with small pests because the tiny pests can get through while many of their larger predators can’t.
For pests such as aphids, whiteflies, mealybugs, and some mites, insecticidal soap can be useful. I apply it in the evening and thoroughly wet the affected areas.
I prefer a premixed product because I’ve managed to make homemade mixtures too strong and burn plants. If you use a concentrate, follow the label carefully rather than assuming stronger means better.
I also wouldn’t spray insecticidal soap indiscriminately across the entire garden. Treat the problem you’re actually trying to solve.
The Florida Pest I Do Treat: Pickleworms
Pickleworms are different.
These caterpillars attack cucurbits, including cucumbers, squash, and watermelons. I often notice them on my cucumbers before my watermelons have even developed fruit, which gives me a pretty good warning that pickleworm season has arrived.
Once a pickleworm bores into a watermelon, that tiny hole becomes a much bigger problem. The caterpillar continues feeding inside the fruit, and the damaged watermelon can begin rotting, cracking, fermenting, and molding from the inside.
At that point, there’s no watermelon worth saving.
How I Use Spinosad Without Blanket Spraying the Garden
Spinosad is one product I use specifically when pickleworms become a threat. But I don’t spray my entire garden, and I don’t even spray the entire watermelon plant.
Once fruit is developing and pickleworms are active, I concentrate the treatment on the watermelon itself and the leaves immediately surrounding it. If caterpillars want to chew some leaves farther down the vine, I’m willing to share. What I’m protecting is the fruit.
I also don’t use Spinosad constantly throughout the year. Targeted use helps reduce unnecessary impacts on other insects and reduces the pressure that can contribute to pest resistance.
Always follow the current product label, including application rates, timing, pollinator precautions, and pre-harvest intervals. The label should determine how a pesticide is used, even if someone else’s garden routine is different.
Tip #5: Learn Exactly When a Watermelon Is Ripe
Growing the watermelon turned out to be only half my problem.
It took me several more seasons to get good at knowing when to harvest one.
Unlike tomatoes, watermelons aren’t particularly forgiving if you pick them early. They don’t continue ripening into a beautifully sweet watermelon while sitting on your kitchen counter. You need to leave them attached until they’re ready.
I don’t rely on one sign. I look for several indicators together.
The Brown Tendril Test
Start by finding the little tendril closest to where the watermelon attaches to the vine.

I want that tendril completely brown and crispy from top to bottom, not just beginning to turn brown.
But I don’t necessarily harvest the minute that happens.
For my larger watermelons, I’ve had better results waiting roughly another five to seven days after the tendril dries. With smaller personal watermelons like Onza, I’ve found that around three to five additional days can be enough.
Those aren’t rigid countdowns for every variety and every garden. They’re observations I’ve used successfully, and I combine them with the other signs of ripeness.
Look at the Rind
A young watermelon tends to look shiny. As it approaches maturity, I notice the rind becoming duller and more matte. Sometimes it develops an almost dusty appearance.
That’s one of the reasons I like using multiple signs. If the tendril is completely brown and the watermelon has lost that youthful shine, I’m getting much more confident that harvest time is close.
The fruit should also have reached the expected size for its variety and feel appropriately heavy when you lift it.
You may even notice small scratches or signs of animal activity on the rind as the melon sweetens. Wildlife has a frustratingly good talent for figuring out that fruit is ripe approximately five minutes before we do.
Check the Field Spot
If your watermelon has been lying on the ground, look underneath it.
The area that has been resting against the soil is called the field spot. An immature watermelon may have a pale or white field spot. As it ripens, I want to see that spot developing into a creamy yellow or deeper yellow color.
The watermelon I recently harvested was growing vertically, so it didn’t have a field spot. That’s why this test can’t be your only indicator.
Why I Don’t Rely on the Thump Test
Then there’s the famous watermelon thump.
People will tell you to tap the watermelon and listen for a particular sound. I have never found the difference obvious enough to make that my primary test.
Hollow, deep, dull, resonant…I could stand there thumping six watermelons and convince myself they all sound different.
I’ll take the completely brown tendril, a few additional days, a dull rind, expected fruit size, and a creamy yellow field spot when available. Those are signs I can actually see.
The Watermelon That Finally Got It Right
Recently, I put all of those signs to the test with one of my Onza watermelons.

The tendril had dried completely several days earlier. The rind had become matte and almost dusty instead of shiny, the fruit felt surprisingly heavy for its size, and based on how quickly these smaller melons had been maturing, I thought the timing was right.
When I cut it open, it was exactly what I’d been trying to grow all those years.
The inside was beautifully ripe, sweet, and still crisp. I personally prefer a crisp watermelon, while my husband likes them a little softer, and getting that combination of crunch and sweetness has sometimes been surprisingly difficult.
Even better, it was a manageable amount of watermelon. We could eat it that evening and the next day instead of trying to figure out what two people were supposed to do with 30 pounds of watermelon.
That one Onza plant had produced eight watermelons at that point. We had harvested two, with six more developing, and the plant was continuing to flower.
After years of struggling to get one good watermelon, I’ll take that.
Growing Watermelons Gets Easier Once You Know What to Watch For
I used to think I was just bad at growing watermelons. Looking back, there wasn’t one mysterious thing I was doing wrong. I was solving a different piece of the puzzle every season.
First it was pollination. Then nutrition. Then disease and pickleworms. Finally, I had to learn when the watermelon was actually ripe.
That’s one of the frustrating and wonderful things about gardening. A crop can make you feel completely incompetent for several years, and then suddenly all those individual lessons start fitting together.
If you’ve struggled with watermelons too, I’d start by making the process easier on yourself. Choose a variety that can mature quickly enough for your conditions, give the plant genuinely nutrient-rich soil, make sure those female flowers are getting pollinated, protect the developing fruit from the pests that can actually destroy it, and don’t rush the harvest.
And if your first watermelon still isn’t perfect, keep going. Mine certainly wasn’t.
It took me five years to get here. Now I’m standing in the kitchen eating a perfectly ripe watermelon from a plant with six more waiting outside, which makes all those terrible early watermelons feel a little more worthwhile.