Last Updated on January 21, 2026 by Homegrown Florida
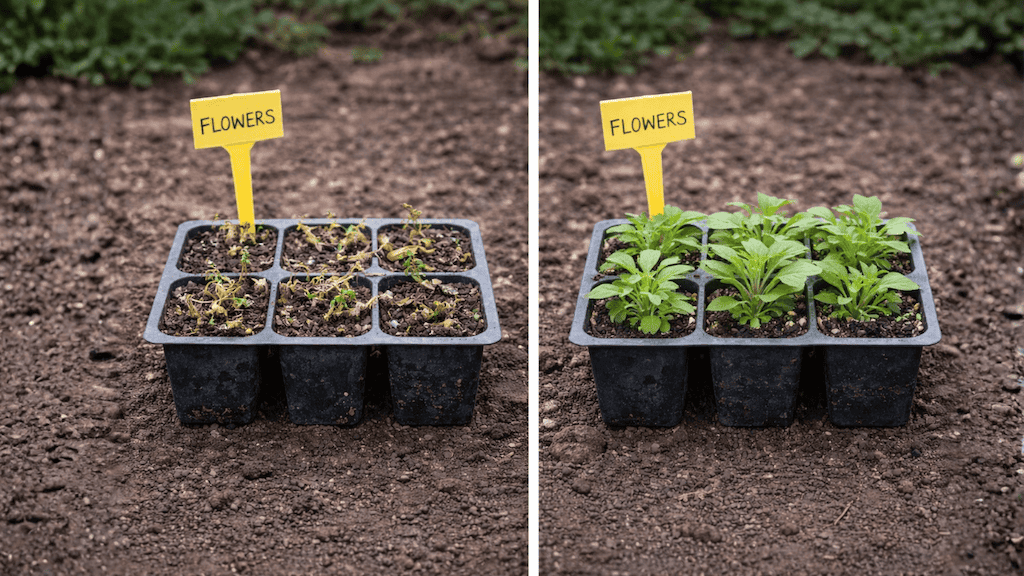
For a long time, I thought flower seeds starting failures were random. Some trays would come up beautifully, others would sit there doing absolutely nothing, and I couldn’t figure out why. It felt like luck, or bad timing, or maybe just me not having a green thumb for flowers.
Turns out, it wasn’t random at all.
Table of Contents
This post may contain affiliate links. Read full disclosure here.
Once I slowed down and started paying attention to what was actually happening, the pattern became obvious. There are a handful of very specific reasons seeds fail, especially flower seeds, and once I fixed those, my germination rates completely changed. What used to feel frustrating and unpredictable is now one of the easiest parts of my garden routine.
The Soil Matters More Than You Think
One of the biggest mistakes I see is using the wrong soil. Seed starting mix is not the same thing as potting soil, and it’s definitely not garden soil. What flower seeds need is something soft, fluffy, and light, usually made with peat moss or coconut coir. If the mix has chunks of wood, sticks, or bark, it’s going to cause problems.

I usually use ProMix, but I’ve also had good luck with other fine textured mixes. Sometimes you don’t really know what you’re getting until you open the bag, which is frustrating, but if the soil doesn’t feel airy and soft in your hands, it’s not what you want for seeds. There are also dedicated seed starting mixes sold in smaller bags, often tucked away near orchid or specialty soils, and those are almost always a safe bet.
Just as important as the soil itself is getting it wet before planting. Dry seed mix is hydrophobic, meaning water beads off instead of soaking in. If you fill trays with dry mix and water afterward, the moisture never distributes evenly, and flower seeds struggle to germinate. I always moisten the soil first and let it sit for 15-20 minutes so it can fully absorb before planting anything.
Sometimes the Flower Seeds Really Are the Problem
I usually save this one for later because most failures are not actually bad seeds, but it does happen. Seeds don’t last forever, and poor storage or old inventory can kill germination rates fast. If you’re planting 10 seeds and only one or two sprout, that’s not normal.
When I buy flower seeds, I look for companies that test and list germination rates. That information matters. A packet showing an 85-95% germination rate tells you what to expect, and it also helps you troubleshoot. If a packet say 99% and nothing comes up, you know the issue is somewhere else in your process.
One of my favorite places to get good quality seeds is Grow Hoss. I especially love their variety of flower seeds that grow well in warm climates, like Florida.
Timing matters too. Some flowers prefer warmth, others prefer cooler conditions, and starting them at the wrong time of year can make it seem like the flower seeds are bad when they’re really just waiting for the right conditions.
Planting Depth Can Make or Break Germination
Flower seeds are often tiny, and many of them need light to germinate. That means they should not be buried. A general rule I follow is that seeds should never be planted deeper than they are tall, and for very small seeds, that usually means laying them on the surface and gently pressing them into the soil.

When the soil is properly moist, it holds shape, and that makes this much easier. I create a shallow indentation, drop the seeds in, and lightly mist them to settle them into place. No soil on top. Just moisture and light.
Larger seeds are different. Those can be planted deeper, but even then, they don’t need to be buried aggressively. Just enough soil to anchor them while still allowing light and air to reach them.
Seeds don’t need full sun to germinate, but they do need brightness. Indirect daylight is enough until they sprout. Once they do, everything changes.
The moment seedlings emerge, they need strong light. Outdoors, that means moving them into more sun. Indoors, that means lowering grow lights to within one or two inches of the seedlings. This is where a lot of leggy, weak plants start.
Cold Stratification Is Not Optional for Some Flowers
This was one of the biggest breakthroughs for me.
Many flower seeds are designed to go through winter before they sprout. In nature, they fall to the ground in fall, sit through cold and moisture, then germinate when temperatures rise. That cold, wet period is what triggers them.
In Florida, we don’t reliably get that kind of winter. So if a seed requires cold stratification and you skip it, you may be waiting forever.
Cold stratification can be done a few different ways. Sometimes placing seed packets in the refrigerator is enough. Other times, seeds need moisture as well, which can be done by placing them in damp soil or on a wet paper towel inside a sealed bag. Most seeds that need this process require four to eight weeks of cold.
I often split the difference. I’ll plant some seeds right away to see if they sprout without stratification, and I’ll put the rest in the refrigerator as backup. That way I’m not losing time either way.
Hard Seed Coats Need Help
Some seeds have thick, hard outer shells that take a very long time to break down naturally. These seeds can sit in soil for months or even years before germinating unless something weakens that outer coating.
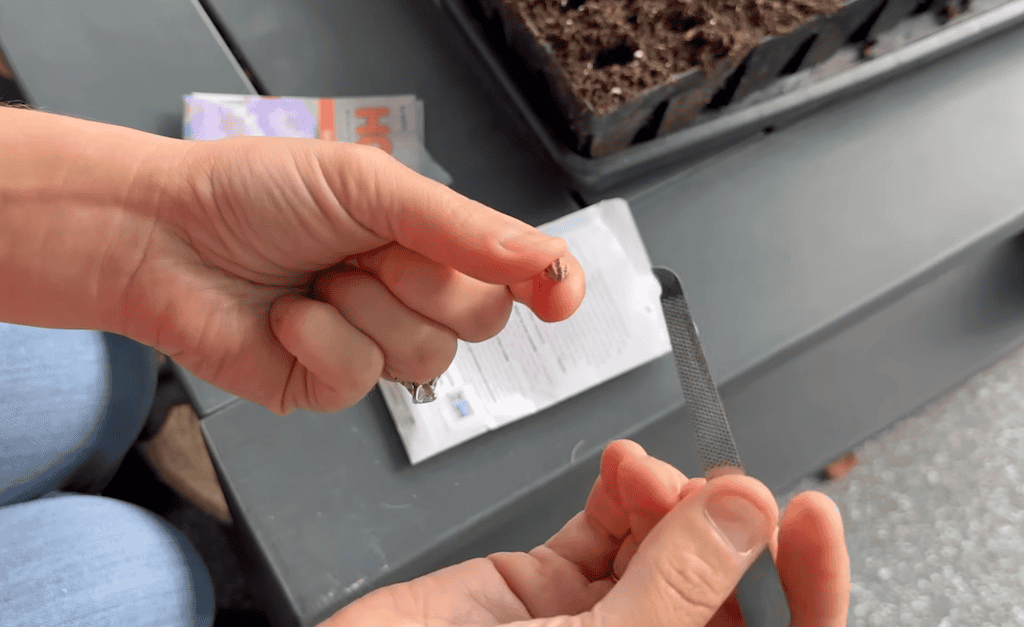
That’s where scarification comes in. The goal is to create a small break or thin spot in the shell so water can penetrate. This can be done by soaking seeds in water, but for very hard seeds, I’ve found gentle abrasion works better. A nail file or sandpaper is usually enough. You’re not trying to crush the seed, just weaken the surface.
Once scarified, those seeds are planted slightly deeper than tiny seeds, watered in, and left alone. The difference in germination speed can be dramatic.
What Changed Everything for Me
Once I stopped treating seed starting like a failure mystery and started paying attention to soil texture, moisture, light, temperature, and seed type, everything clicked. Germination stopped feeling random. I could look at a tray and usually tell why something wasn’t working.
This season is the most flowers I’ve ever started at once, and instead of feeling overwhelmed, I’m excited. The process finally feels predictable, and that makes all the difference.
If seeds haven’t worked for you in the past, it’s probably not you. It’s usually just one small thing that’s off.