Last Updated on January 8, 2025 by Homegrown Florida
This post may contain affiliate links. Read full disclosure here.
When I first started gardening, one of the biggest challenges I faced was starting plants from seed. It’s a bit of a learning curve, and it took me a while to figure out the best techniques for growing strong, healthy plants from scratch. The second major hurdle was transplanting — the process of moving delicate seedlings from their cozy setup into the sometimes harsh conditions of the garden. Today, I’m sharing my eight best tips for transplanting seedlings successfully every time.
1. Hardening Off: Acclimating Your Seedlings to the Outdoors
The most important step in successful transplanting is hardening off. Hardening off means gradually introducing your seedlings to the outdoor environment so they can adjust to temperature, wind, and sunlight without going into shock.

If your plants have been growing indoors, they’ve likely been pampered with consistent temperatures and perfect lighting. To harden them off, start by bringing them outside for short periods, choosing times when the outdoor temperature is closest to the temperature inside your home. For northern climates, this might be midday to early afternoon. But here in Central Florida, where midday temperatures can soar to 90°F, I bring my seedlings out in the cooler evening hours.
Leave them outside for just a few hours at first, then gradually increase the time over five to seven days. Once your seedlings are handling full days outdoors without wilting or showing signs of stress, they’re ready for transplanting.
2. When to Transplant: Look for Root and Leaf Development

Timing is everything when it comes to transplanting. You want to transplant seedlings when they’re strong enough to survive the move, but not so old that they become root-bound.
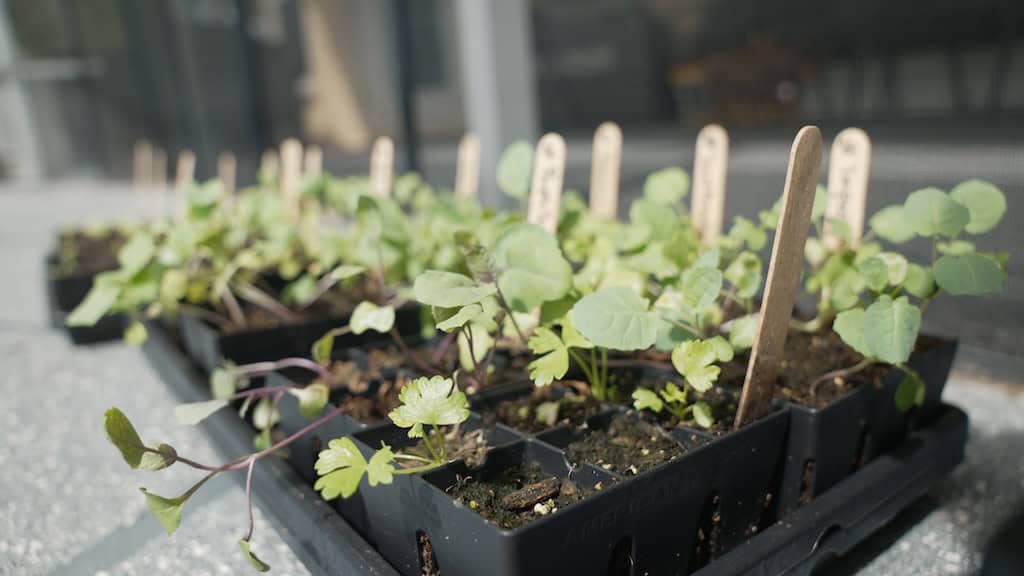
One key sign that your seedlings are ready is the appearance of roots poking out from the bottom of the tray. This shows that the roots are well-developed and looking for more space. Another way to tell is by counting the leaves. Seedlings start with “seed leaves,” which look different from the plant’s mature leaves. Once the plant develops at least one pair of true leaves (the ones that resemble the adult plant’s leaves), it’s generally safe to transplant. However, waiting until the seedling has two sets of true leaves will give you a stronger plant that’s more likely to survive the transplant.
3. Choose the Perfect Day to Transplant

The best days for transplanting seedlings are cloudy days, or days when rain is in the forecast. The softer light and cooler temperatures help ease the plants’ transition from their indoor environment to the garden.
If you’re transplanting during a hot season (like we often face here in Florida), it’s best to move your plants in the late afternoon or early evening. This gives them time to adjust overnight and benefit from the gentle morning sun before facing the heat of the day. For gardeners in cooler climates, it’s often better to transplant in the early morning to give seedlings a full day of sunlight to settle in before the cooler nighttime temperatures hit.
4. Planting Multiple Seedlings: Double Your Chances for Success

When you’re starting seedlings in trays, it’s a good idea to plant two seedlings per cell. This gives you a backup in case one doesn’t survive the transplant. As the plants grow, you can select the stronger of the two to keep in the ground.
Once the seedlings are about a foot tall, or four to six weeks old, you can clip the weaker one. I’ve found that leaving two seedlings together in the early stages doesn’t negatively impact their growth, and it’s a great insurance policy in case something happens to one of them after transplanting.
5. Use Granular Fertilizer for Long-Lasting Nutrition

Before transplanting, you’ll want to ensure your seedlings have access to the nutrients they need to thrive. Adding a granular fertilizer to the planting hole helps feed the seedlings slowly and consistently as they settle into their new home.
I prefer to use organic granular fertilizers like Dr. Earth or Espoma, which have balanced NPK ratios (Nitrogen, Phosphorus, Potassium) to promote healthy growth. Granular fertilizers provide a slow-release source of nutrients, which is ideal for newly transplanted seedlings. Liquid fertilizers, while useful for plants in distress, tend to act too quickly and can wash through the soil too fast to be beneficial in the long run.
Simply sprinkle a small amount (around 2 tablespoons) into the hole before planting, mix it into the soil, and your seedlings will have a steady supply of nutrients as they grow.
6. Removing Seedlings from Trays Without Damaging Roots

Getting your seedlings out of their trays can be tricky, especially if you’re using standard garden flats that don’t have large holes at the bottom. One of the easiest ways to remove seedlings is by gently pushing them out from the bottom.
If you’re using reusable seed trays with air-pruning slits (like those from Epic Gardening), they usually have holes at the bottom that make it easy to push the seedling out without damaging the roots. Simply stick your finger in the hole, push up, and the plant comes out cleanly, ready for transplant.
If you’re using more traditional trays, try gently squeezing the bottom or using a spoon to loosen the soil and lift the seedling out. Be careful not to damage the roots, as they’re still delicate at this stage.
7. Ensuring Good Contact Between Roots and Soil

Once you’ve placed your seedling into the hole, you want to make sure it has good contact with the soil. This means pressing the soil firmly around the plant to eliminate air pockets, which can dry out roots and slow growth.
For most plants, you want the soil level to match the level in the tray. Brassicas (like broccoli and kale), tomatoes, and peppers can be planted slightly deeper, but other plants should be set at their original depth. After placing the seedling, gently press down around the base to ensure the roots are snugly in contact with the soil.
8. Watering In: Hydrating for Success

The final and most important step in transplanting is giving your seedlings plenty of water. They’ve just gone through a major transition, and watering helps them settle into their new environment by hydrating their roots and eliminating any remaining air pockets in the soil.
When watering, make sure to soak the area not just around the seedling, but the surrounding soil as well, so the roots can easily expand into moist soil. For the first five days, check the soil daily to ensure it stays moist. Even if the surface looks damp, stick your finger into the soil to check the moisture below. I typically water every other day for the first week to help the seedlings establish themselves.
By following these eight transplanting tips, you’ll give your seedlings the best possible chance to thrive in their new garden home. Happy gardening!


