
Last Updated on October 1, 2026 by Homegrown Florida
If you grow a lot of vegetables in containers, buying potting soil can get expensive very quickly. Between grow bags, GreenStalks, pots, and other containers, I’d hate to think how much money I’d spend if I replaced all of that soil every growing season.
Thankfully, you don’t need to.
Table of Contents
This post may contain affiliate links. Read full disclosure here
I reuse my potting soil year after year. Once a crop is finished, I collect the old soil and refresh it before using it again. The soil itself hasn’t suddenly gone bad just because a plant grew in it. What has changed is the amount of nutrients, organic matter, and structure available for the next plant.
Most of the time, refreshing old potting soil comes down to three things: adding compost, restoring drainage, and replacing nutrients with fertilizer. There are a few exceptions, particularly if you’ve had a serious pest or disease problem, but even then you may not necessarily have to throw all that soil away.
Considering what a bag of decent potting soil costs these days, I’m going to make that soil work for as many seasons as I possibly can.
Why You Should Reuse Old Potting Soil
Potting soil is one of the biggest ongoing expenses for container gardeners. A single bag may not seem terrible, but start filling multiple 10-gallon grow bags, large pots, or an entire GreenStalk and suddenly you’re standing in the garden center wondering how dirt became a luxury item.
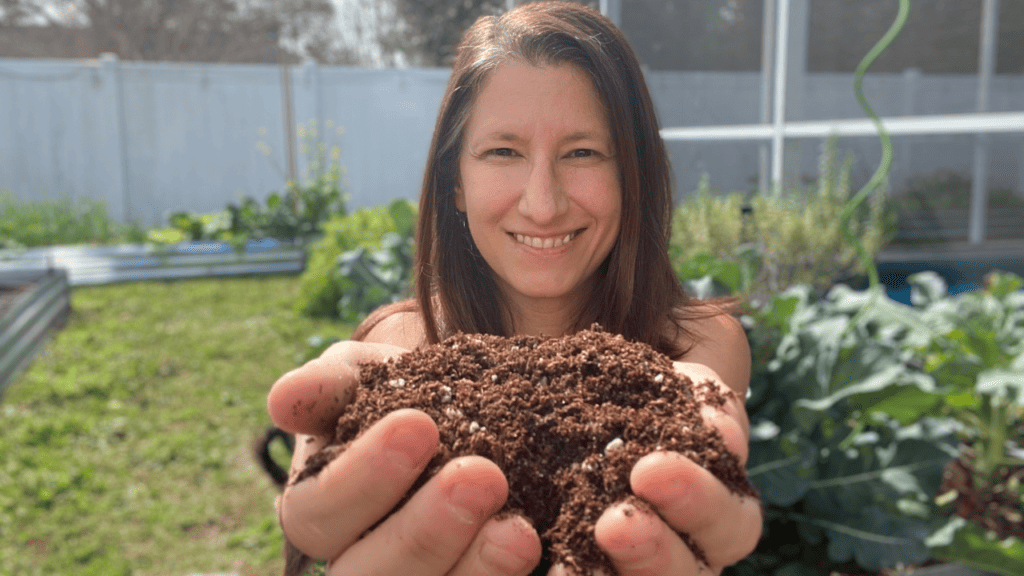
For me, reusing potting soil is especially important because I grow so many plants in containers. When a crop finishes, I don’t automatically dump that soil into the compost pile and start over. I collect it.
That might include soil from:
- GreenStalks
- Grow bags
- Vegetable containers
- Strawberry planters
- Pots from annual plants
- Containers from trees or other plants that didn’t make it
I’ll often dump everything together into my Gorilla Cart or another large container until I’m ready to refill something. Mixing soil from several containers also helps even things out. Some may be extremely dry, while others may still be holding quite a bit of moisture.
My strawberries are a good example. Florida summer and strawberries aren’t exactly best friends, and mine rarely make it through the entire summer. Once they’re done, the plants and roots can go into the compost and the potting soil gets another job.
What Happens to Potting Soil After a Growing Season
Used potting soil usually isn’t useless. It’s depleted.
Plants have spent months pulling nutrients from it. Organic materials in the original potting mix have continued decomposing, and repeated watering can wash nutrients out of the container. The physical structure can change too, particularly after a long growing season.
That’s why simply pulling out the old plant and sticking a new one into exactly the same soil isn’t my preferred approach. I’m asking that soil to support another crop, so I want to replace some of what the previous crop used.
I think about three basic things:
- Organic matter and some nutrients from compost
- Structure and drainage from perlite, vermiculite, or sand
- Additional nutrients from a balanced granular fertilizer
The exact amounts don’t have to be identical every time. I look at the condition of the old soil and adjust accordingly. Soil that’s still loose and well-draining may not need nearly as much perlite as soil that’s compacted and holding too much water.
Step #1: Gather and Prepare Your Used Potting Soil
Start by gathering the potting soil from your finished containers. Remove large plant material and root balls, but don’t worry about picking out every tiny root.
Those little roots aren’t going to hurt anything. They’ll eventually decompose and become part of the organic matter in the soil.
If the old soil is extremely wet, it’s easier to work with after it dries somewhat. I normally like to spread mine on a tarp and let it sit for a day before mixing everything together.
Florida weather doesn’t always cooperate with that plan.
When I recently refreshed the soil from my GreenStalk strawberries, we’d had about a week of almost nonstop heavy rain. The potting mix wasn’t just damp. It was basically mud, and there wasn’t a dry day anywhere in the forecast.
Instead of waiting indefinitely, I mixed that saturated soil with the extremely dry used potting soil I’d been storing in my shed. The two helped balance each other out, and once I added additional drainage material, the mixture became much easier to work with.
The goal isn’t to get the old soil looking perfect before you begin. Get rid of the major debris, break apart large clumps, and then use its current condition to help determine what it needs.
Step #2: Add Compost to Restore Organic Matter and Nutrients
The first thing I add is compost.
If there’s one amendment I want consistently going back into my garden and containers, it’s good compost. It adds organic matter, contributes nutrients, supports biological activity, and helps rebuild some of what has been lost while the previous crop was growing.
I use homemade compost whenever I have it available. It doesn’t have to look like perfectly sifted potting soil before I’ll use it, either. If it’s mostly broken down but I can still see an occasional little stick or piece of shredded paper, I’m not worried about it. That material can continue decomposing in the container.
For the batch I was refreshing, I added about two bucketfuls of compost to my collected soil. Rather than treating that as an exact recipe, use it as a starting point and look at how much old potting soil you’re working with.
The goal is to introduce a meaningful amount of fresh organic matter without turning the entire mixture into compost.
Choosing the Best Compost You Can Find

My first choice is homemade compost because I know exactly what’s in it. If you’re not composting yet, I highly recommend starting. That first batch can feel like it takes forever, but once you have a system going, you’ll have a steady source of one of the most useful amendments you can give your garden.
If homemade compost isn’t available, I’d look for locally produced compost from a farm, nursery, garden center, or even a reputable local seller. You can sometimes find excellent compost through local gardening groups or Facebook Marketplace.
Bagged compost works too, but quality can be inconsistent. I’ve opened bags that were beautifully decomposed and others that seemed to contain more sticks than compost.
Black Kow is one bagged option I’ve had good experiences with, although even bagged products can vary from one batch to another. I’ve also tried inexpensive generic compost and mushroom compost with mixed results.
Use the best compost you can reasonably find and afford. We’re trying to improve old potting soil, so the quality of what we add matters more to me than the name printed on the bag.
Step #3: Restore Drainage With Perlite, Vermiculite, or Sand
Next, I look at structure and drainage.
Over time, potting mix can settle and compact. Some of the original materials break down, which can reduce the amount of air space around the roots and cause the mix to hold more water than it did when it was new.
For this, you can add:
- Perlite
- Vermiculite
- Coarse sand
I generally use perlite. It’s lightweight and helps create additional air space in the potting mix so excess water can move through more easily.
This was particularly important when I refreshed the soil from my strawberry GreenStalk because it was so wet. Even after combining it with the dry soil I’d been storing, I wanted considerably more drainage.
I kept adding perlite until I could clearly see those white pieces distributed throughout the mixture. As I mixed, the soil stopped clumping together as badly and became much easier to put back into the GreenStalk.
How Much Drainage Material Does Old Potting Soil Need?
I don’t use one exact measurement every time because the old soil tells me what it needs.
If the mixture is already light, loose, and drains beautifully, you may only need a small amount of additional perlite. If it’s heavy, compacted, or staying saturated for too long, add more.
That’s also why I wouldn’t blindly follow a recipe telling you to add the same amount of perlite every single time you refresh potting soil. You’re trying to correct the structure of the mixture you actually have in front of you.
Florida gives us an interesting balancing act. Our heat can dry containers very quickly, but during our rainy season they can also stay saturated day after day. We need a potting mix that holds enough moisture to support the plant without turning into a swamp every time the afternoon thunderstorms settle in.
My strawberries may have been a casualty of exactly that problem. They struggle with Florida summer anyway, but those GreenStalk pockets were absolutely soaked after our prolonged rain.
More perlite isn’t going to magically make strawberries love August in Florida, but improving drainage certainly isn’t going to hurt.
Step #4: Add a Balanced Granular Fertilizer
The final ingredient is fertilizer.
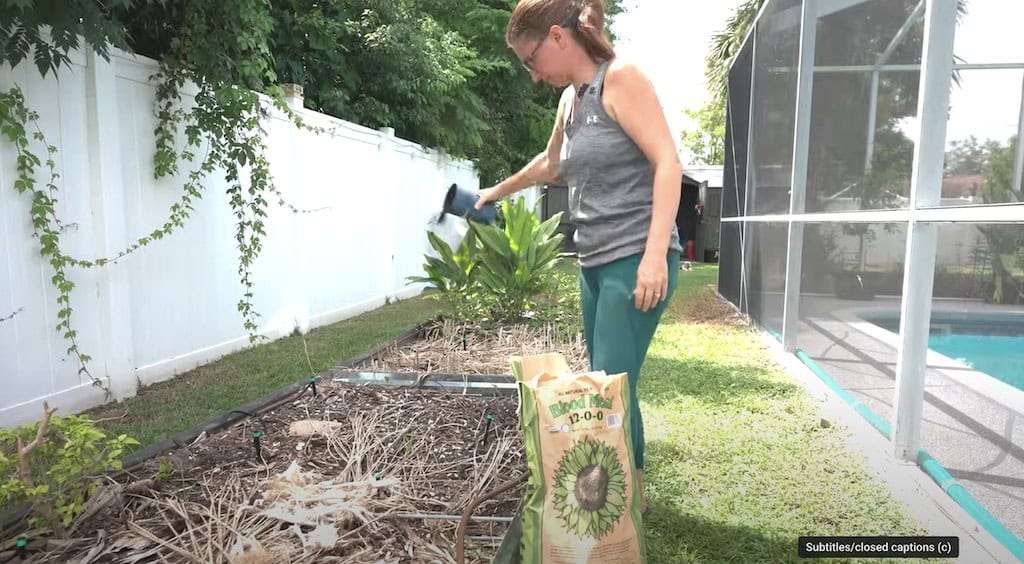
The previous plants have already removed nutrients from the potting soil, and compost alone may not provide everything the next crop needs. I want to restore those nutrients before I fill the containers again.
For general soil refreshing, I use a fairly balanced all-purpose granular fertilizer.
The Hoss fertilizer I used in this batch has an N-P-K of 5-4-3:
- 5% nitrogen
- 4% phosphorus
- 3% potassium
You don’t need that exact fertilizer or those exact numbers. I’m looking for the three numbers to be relatively close rather than using something extremely high in only one nutrient.
Other all-purpose granular fertilizers can work just as well. Brands such as Down to Earth, Espoma, and others make options designed for general garden use. Plant-tone is another possibility, while Tomato-tone can work particularly well if you already know the refreshed soil is going to be used for fruiting vegetables.
Follow the application rate for the fertilizer you’re using rather than copying the amount of a completely different product. Fertilizer concentrations vary, so more isn’t automatically better.
Why I Use Granular Fertilizer When Refreshing Soil
I specifically want granular fertilizer at this stage because I’m adding it before the plants go in.
Granular organic fertilizers need time to break down and become available to plant roots. By mixing them into the soil now, that process can begin before the new plants start demanding those nutrients.
Liquid fertilizer serves a different purpose. I use liquid fertilizers later in the growing season when container plants need additional feeding and I want nutrients available more quickly.
Think of the granular fertilizer as part of preparing the soil for the season. Liquid fertilizer is something I can use later to supplement the plants while they’re actively growing.
The Simple Recipe I Use to Refresh Old Potting Soil
Once you’ve gone through all of that, the actual process is pretty simple.
Start with your used potting soil and add:
- Compost to restore organic matter and contribute nutrients
- Perlite, vermiculite, or coarse sand as needed to improve structure and drainage
- A balanced granular fertilizer to replenish nutrients for the next crop
Mix everything thoroughly so the compost, drainage material, and fertilizer are distributed throughout the old potting soil.
That’s it.
You don’t need 15 different amendments or a complicated recipe every time you reuse a container. Look at what the soil has lost and put those things back.
Once my mixture was refreshed, I used it to refill my GreenStalk rather than buying enough new potting mix to start from scratch. When you’re filling a large vertical planter or multiple containers, that difference adds up very quickly.
When You Shouldn’t Reuse Potting Soil Normally
There is one big exception to my “don’t throw away your potting soil” rule.

If the previous plants had a significant soil-related pest or disease problem, I wouldn’t dump that soil into my general pile, mix it with everything else, and then plant the exact same crop back into it.
Examples might include a serious tomato disease or a pest with a life stage that can remain in the soil.
That doesn’t automatically mean the soil has to go into the trash. It does mean I want to treat it differently.
You have a few options depending on the problem, how much soil you’re dealing with, and whether replacing it is financially realistic.
What to Do With Soil That Had Pests or Disease
The easiest option is starting with fresh potting soil for a susceptible crop. If I had a serious tomato disease in a container and could afford to replace that soil, I wouldn’t immediately put another tomato into it and hope for the best.
But replacing large amounts of potting soil isn’t always practical.
Maybe you’re working with several big containers. Maybe the soil you want isn’t available. Or maybe you simply don’t want to throw away something you paid good money for if there’s another reasonable way to use it.
That’s where crop rotation and layering can help.
Option #1: Rotate Into a Different Plant Family
Instead of mixing questionable soil into your general supply, keep it separate and use it for a crop from a different plant family.
If tomatoes growing in that soil had a serious disease problem, for example, I wouldn’t immediately follow them with another nightshade such as a pepper or eggplant.
Instead, I might grow:
- Sweet potatoes
- Broccoli
- Cowpeas
- Another crop unrelated to the affected plant family
Many plant diseases and pests have specific hosts. Rotating into an unrelated crop can reduce the likelihood that the next plant will be affected by exactly the same problem.
Container gardeners don’t always think about crop rotation because we tend to associate it with large in-ground farms and garden rows. But if you’re reusing potting soil, the same basic principle can be useful.
The important part is keeping track of the questionable soil rather than mixing it with everything else. Once you’ve combined one problem container with 10 healthy ones, you’ve lost the ability to manage it separately.
Option #2: Layer Compost and Mulch Over the Old Soil
Sometimes replacing or rotating the soil isn’t possible. In that situation, another option is leaving the old soil largely undisturbed and creating a barrier over it.
Instead of dumping the soil onto a tarp and thoroughly mixing it like I normally would, leave it in the container. Work some perlite or another drainage material into only the top couple of inches if needed.
Then add:
- 1 to 2 inches of compost
- 1 to 2 inches of mulch over the compost
The mulch can be wood chips, shredded leaves, or another appropriate organic mulch you already use in the garden.
In this situation, I’m intentionally not mixing everything together. I want those layers sitting on top of the old soil.
How Layering Can Reduce Soil Splash and Disease Problems
At first, layering clean compost and mulch over questionable soil may seem pointless. The plant’s roots are still eventually going to grow down into the old potting mix, so haven’t we accomplished nothing?

Not necessarily.
Some soil-borne plant diseases cause problems when contaminated soil splashes onto the foliage during watering or rain. Spores or bacteria can move from the soil surface onto lower leaves, giving the disease access to the above-ground portion of the plant.
The compost and mulch create physical separation between that old soil and the leaves above it.
Instead of rain hitting contaminated soil and splashing it directly onto the plant, it’s hitting a layer of mulch with compost underneath. That barrier can reduce soil splash while also providing the usual benefits of mulch, including moderating soil temperature and reducing evaporation.
Is it a guaranteed solution? Absolutely not.
If you’re dealing with a serious disease that can infect the plant through its roots or a pest capable of attacking the new crop regardless of those layers, mulch isn’t going to magically make the problem disappear. But when replacement isn’t realistic, layering can help reduce one common route of disease transmission and may get you through another growing season.
When Starting With Fresh Potting Soil Is the Better Choice
I love reusing potting soil, but saving money shouldn’t become an excuse to repeatedly set yourself up for failure.
If you had a severe disease or pest problem and you’re planning to grow a susceptible crop in the same container again, fresh potting soil may be the better investment. That’s especially true for a crop you care about enough that losing the entire season would cost you more in time and frustration than replacing the soil.
You also don’t have to make it an all-or-nothing decision. Replace the soil in the problem container while continuing to refresh and reuse the healthy soil from everything else.
For normal depleted potting soil, though, I see very little reason to throw it away. A plant finishing its life cycle doesn’t mean the soil finished its life cycle too.
Keep Reusing Your Potting Soil Instead of Buying It Again
Container gardening will never be completely free, but there are plenty of places where we can stop spending money unnecessarily. Replacing perfectly usable potting soil every season is one of them.
Most old potting soil simply needs to be rebuilt. Add good compost to restore organic matter, improve the structure and drainage with perlite or another appropriate material, and replenish the nutrients your previous crops removed with a balanced granular fertilizer.
Then put it right back to work.
If a container had a serious pest or disease problem, keep that soil separate and make a more deliberate decision. Rotate to an unrelated crop, use compost and mulch to create a protective layer when appropriate, or replace the soil if that’s the safest choice for what you want to grow next.
I’ve purchased plenty of potting soil over the years, and I’m sure I’ll purchase plenty more. But I’m certainly not buying it just because the soil I already own has been used once.
Gardening is expensive enough. The dirt doesn’t need to be disposable.
Sandi J Johnson
Where did you get your composting setup? It looks sturdy! Thanks for this video!
Homegrown Florida
I actually got it from Gardeners Supplies. Its a bit pricey but good quality